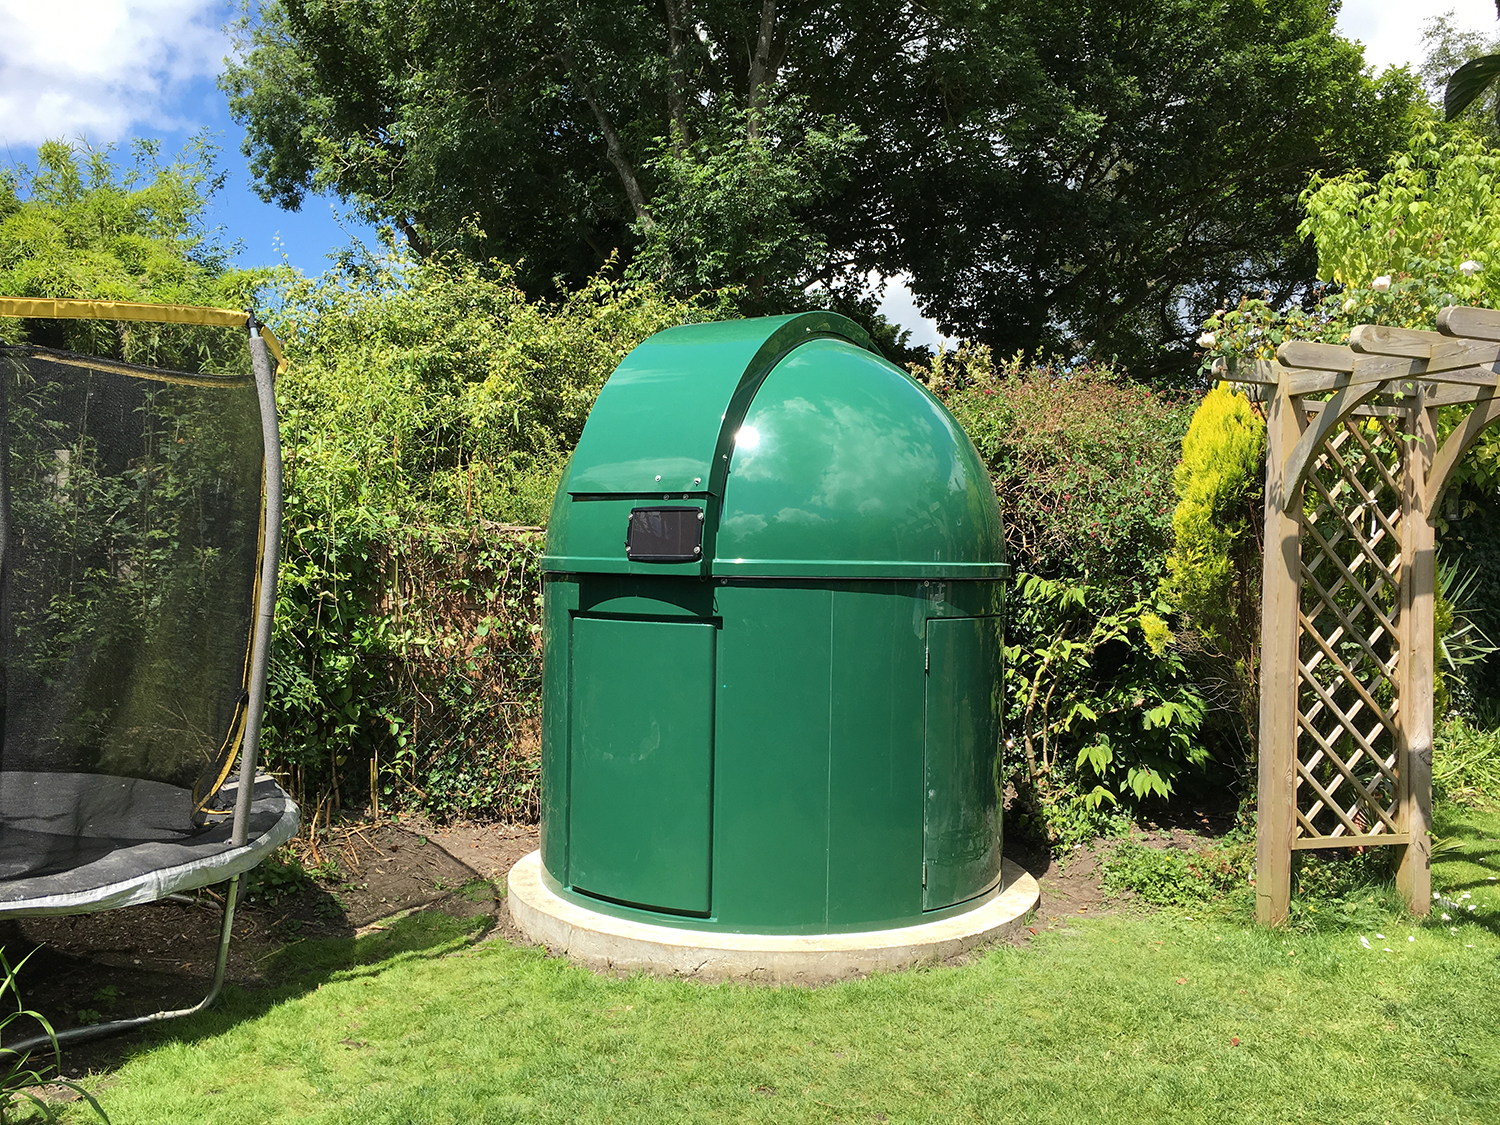
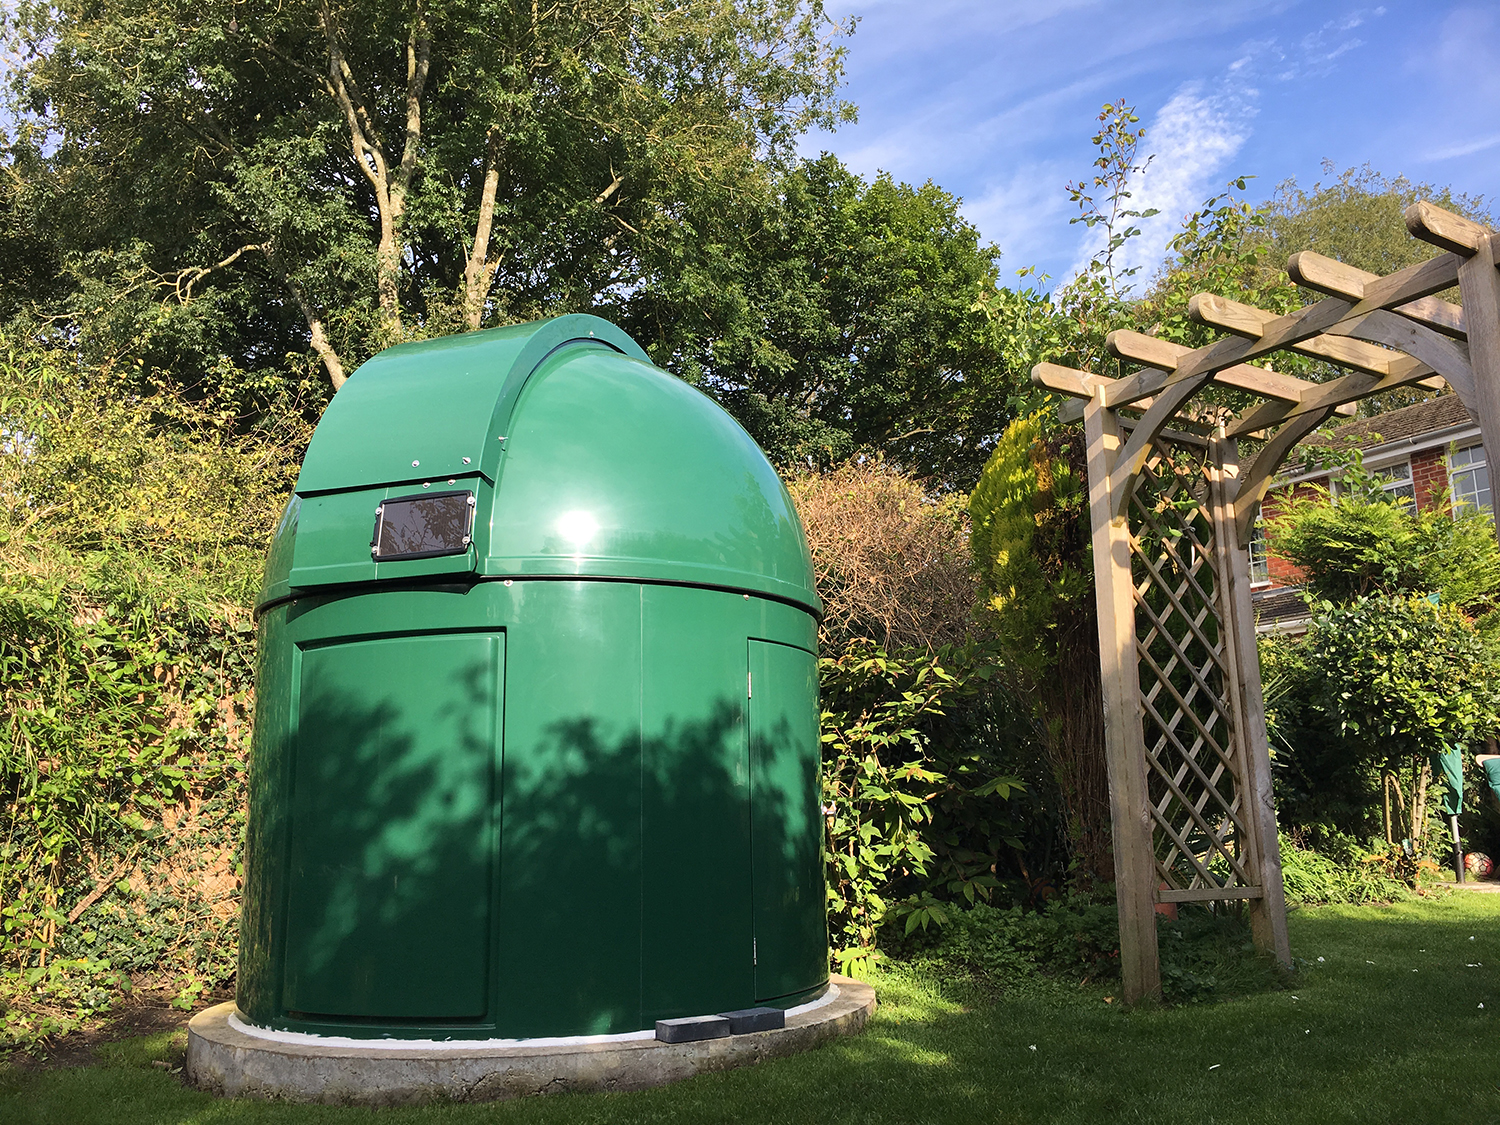
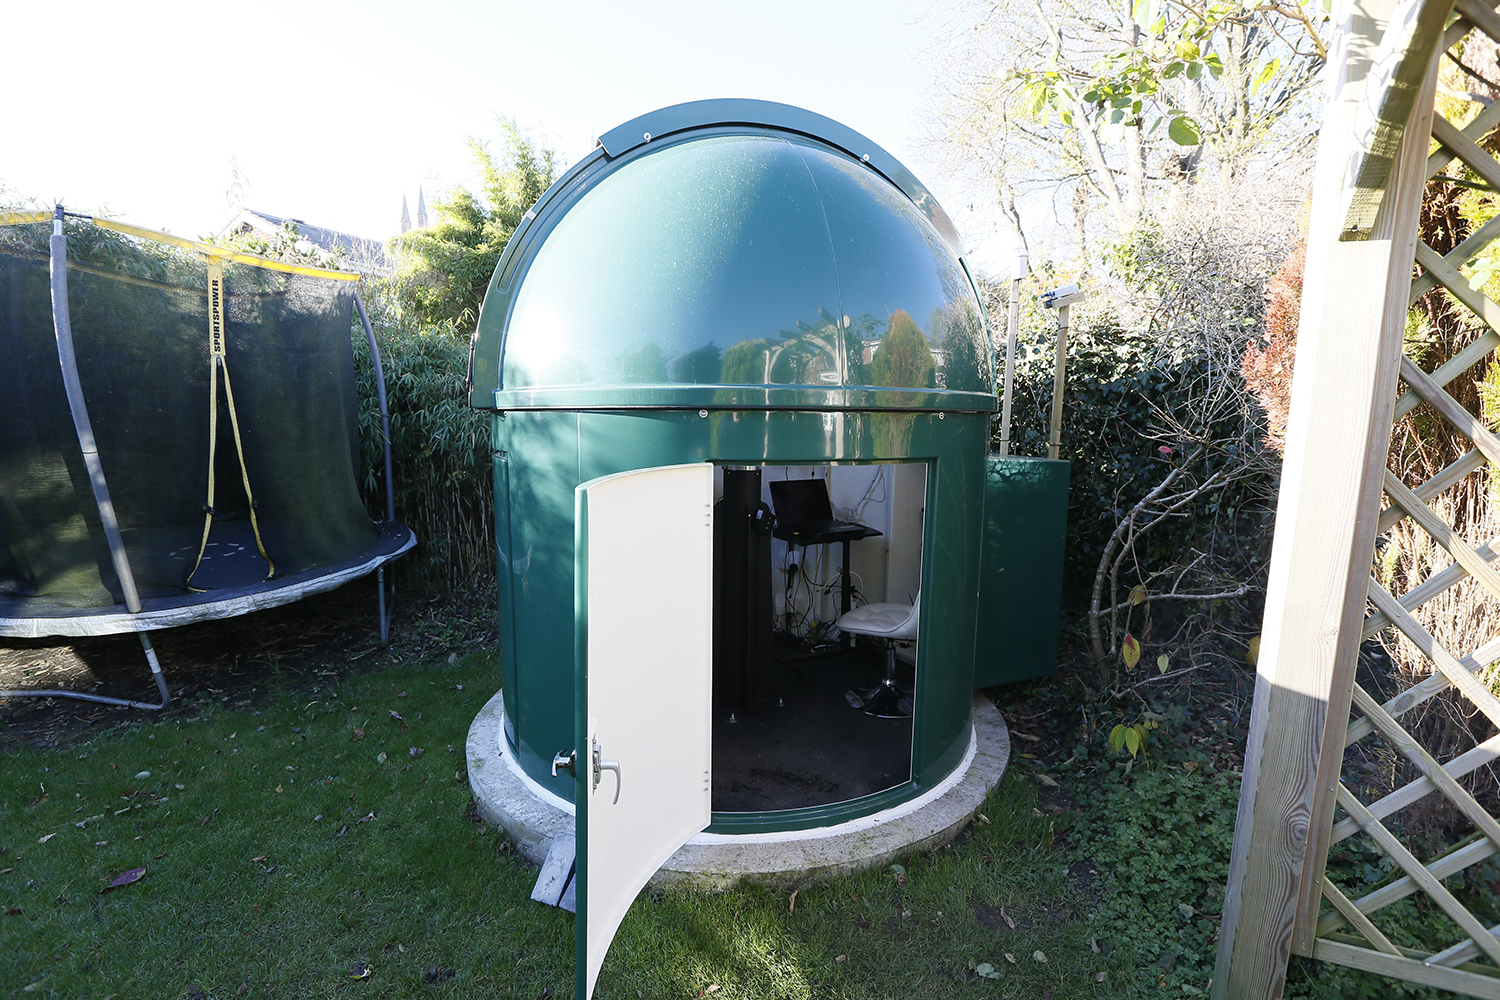
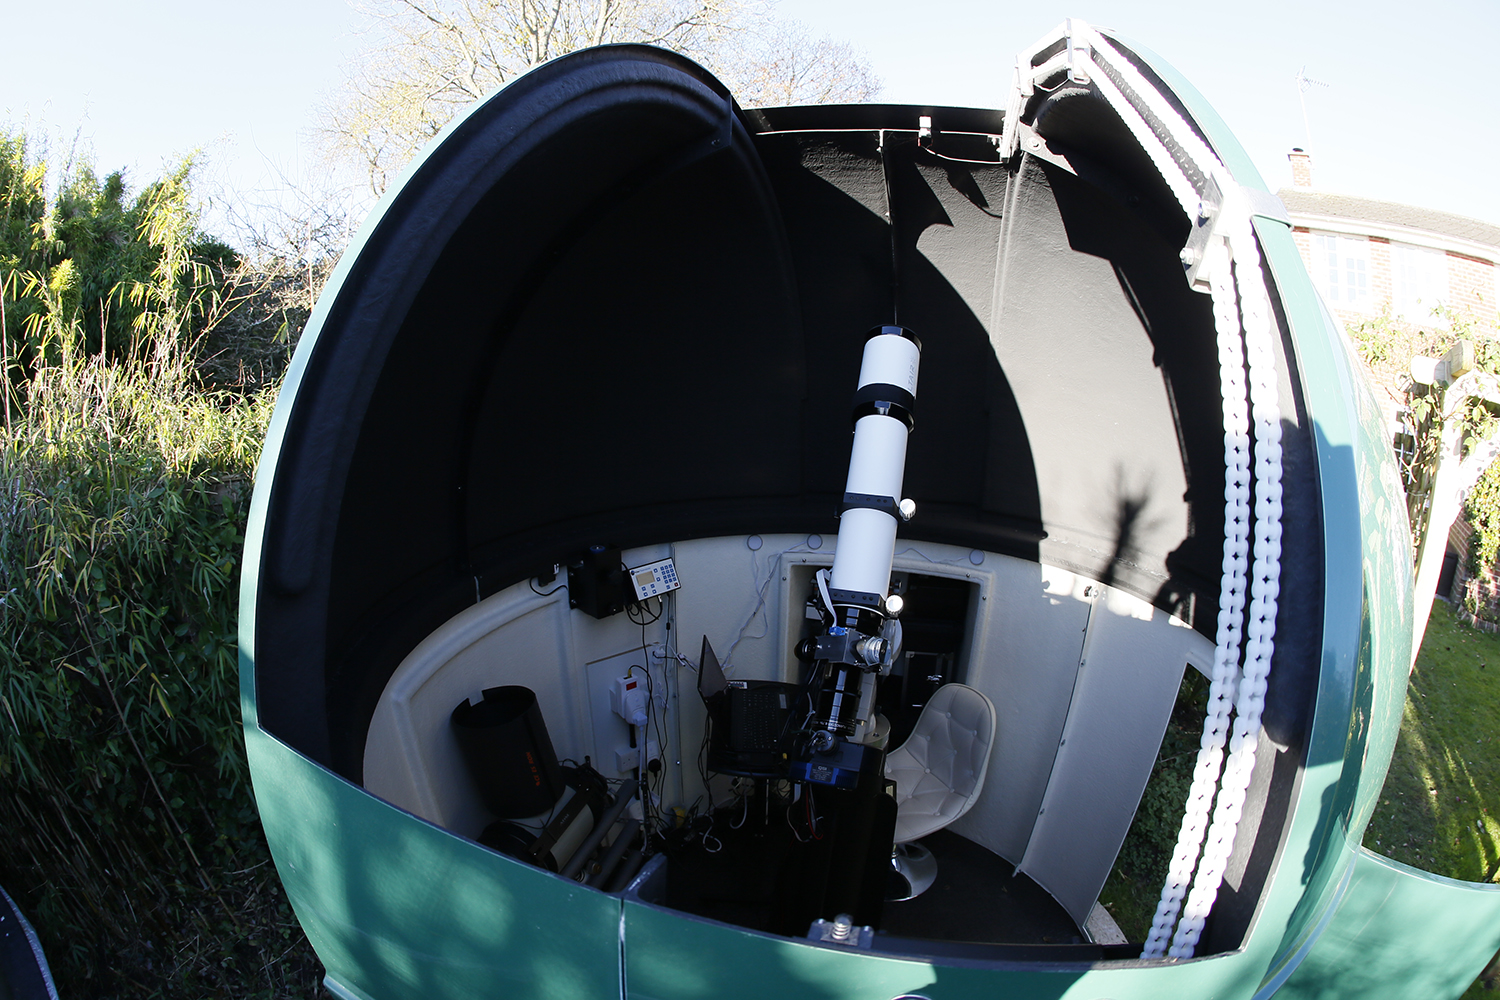
All my imaging is done from The River Park Observatory (or RPO for short), located in my back garden on the south western edge of the small market town of Marlborough in Wiltshire. I have been imaging from my garden since March 2013, but it was in July 2016 that a home for all my kit arrived in the form of a green Pulsar dome. Despite being called a recycling bin or a public lavatory, it has been perhaps the best upgrade I have made, allowing me to be up and running on the flick of a switch and shut down in a matter of seconds. The vagaries of the English climate mean that all too often an imaging session is cut short by the arrival of cloud. The observatory makes this easy to deal with, though not necessarily any less frustrating! This page details all the kit that I run in the RPO to achieve the imaging results that I am happy to have managed so far.
RPO LIVE FEED
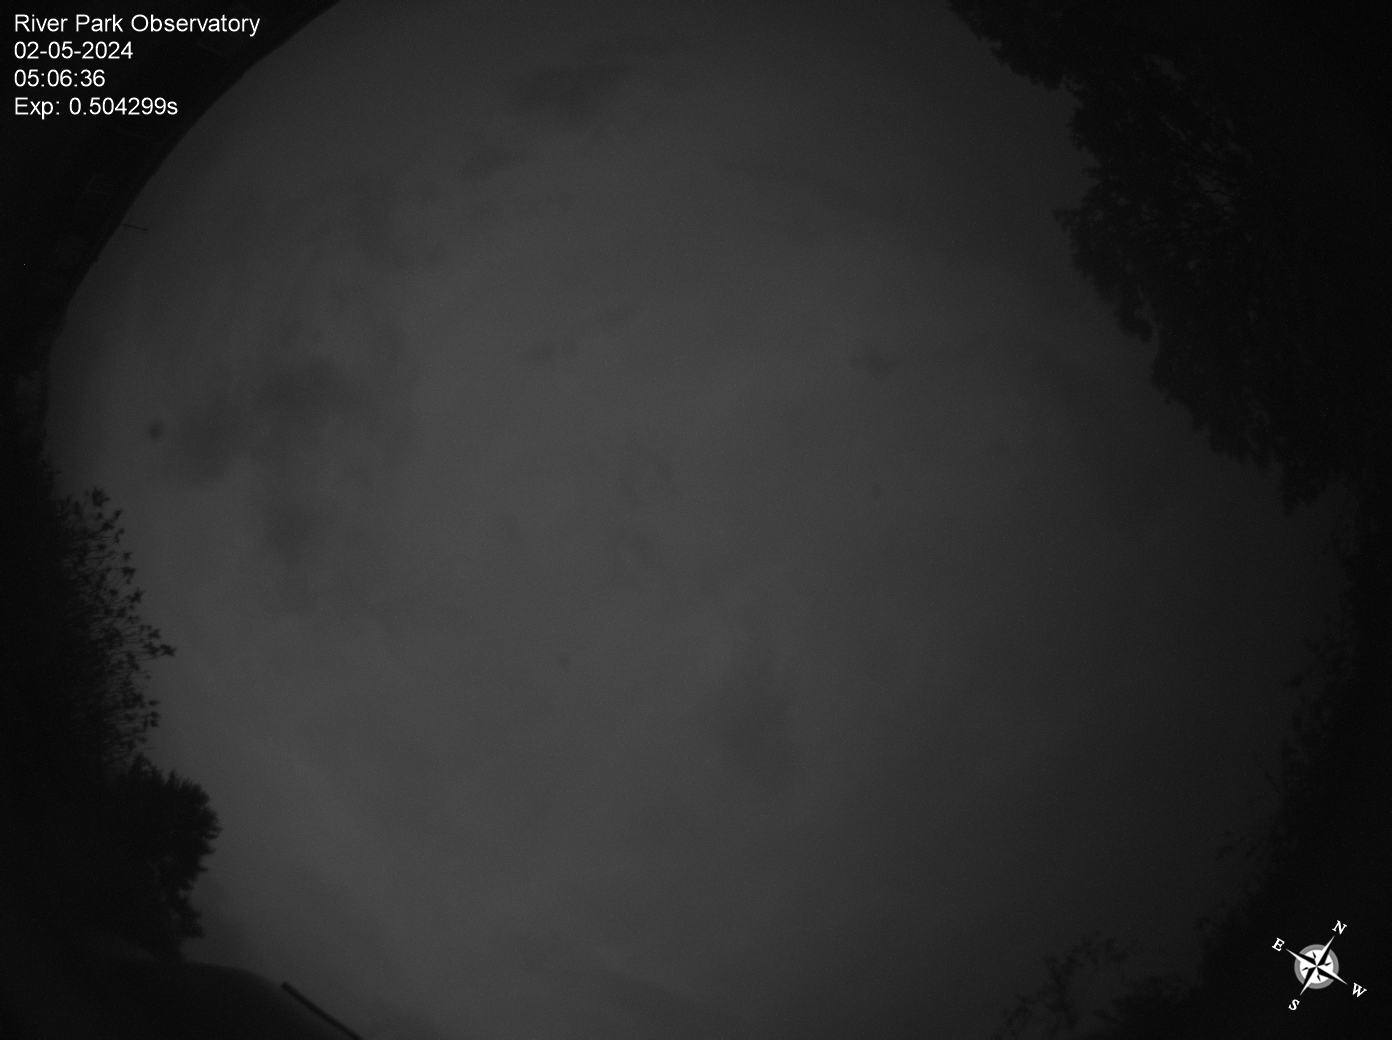
The two images below are the most recent photo and video from the RPO all sky camera
Click them for a larger view
Click here for an archive of interesting RPO all sky camera
photos and videos
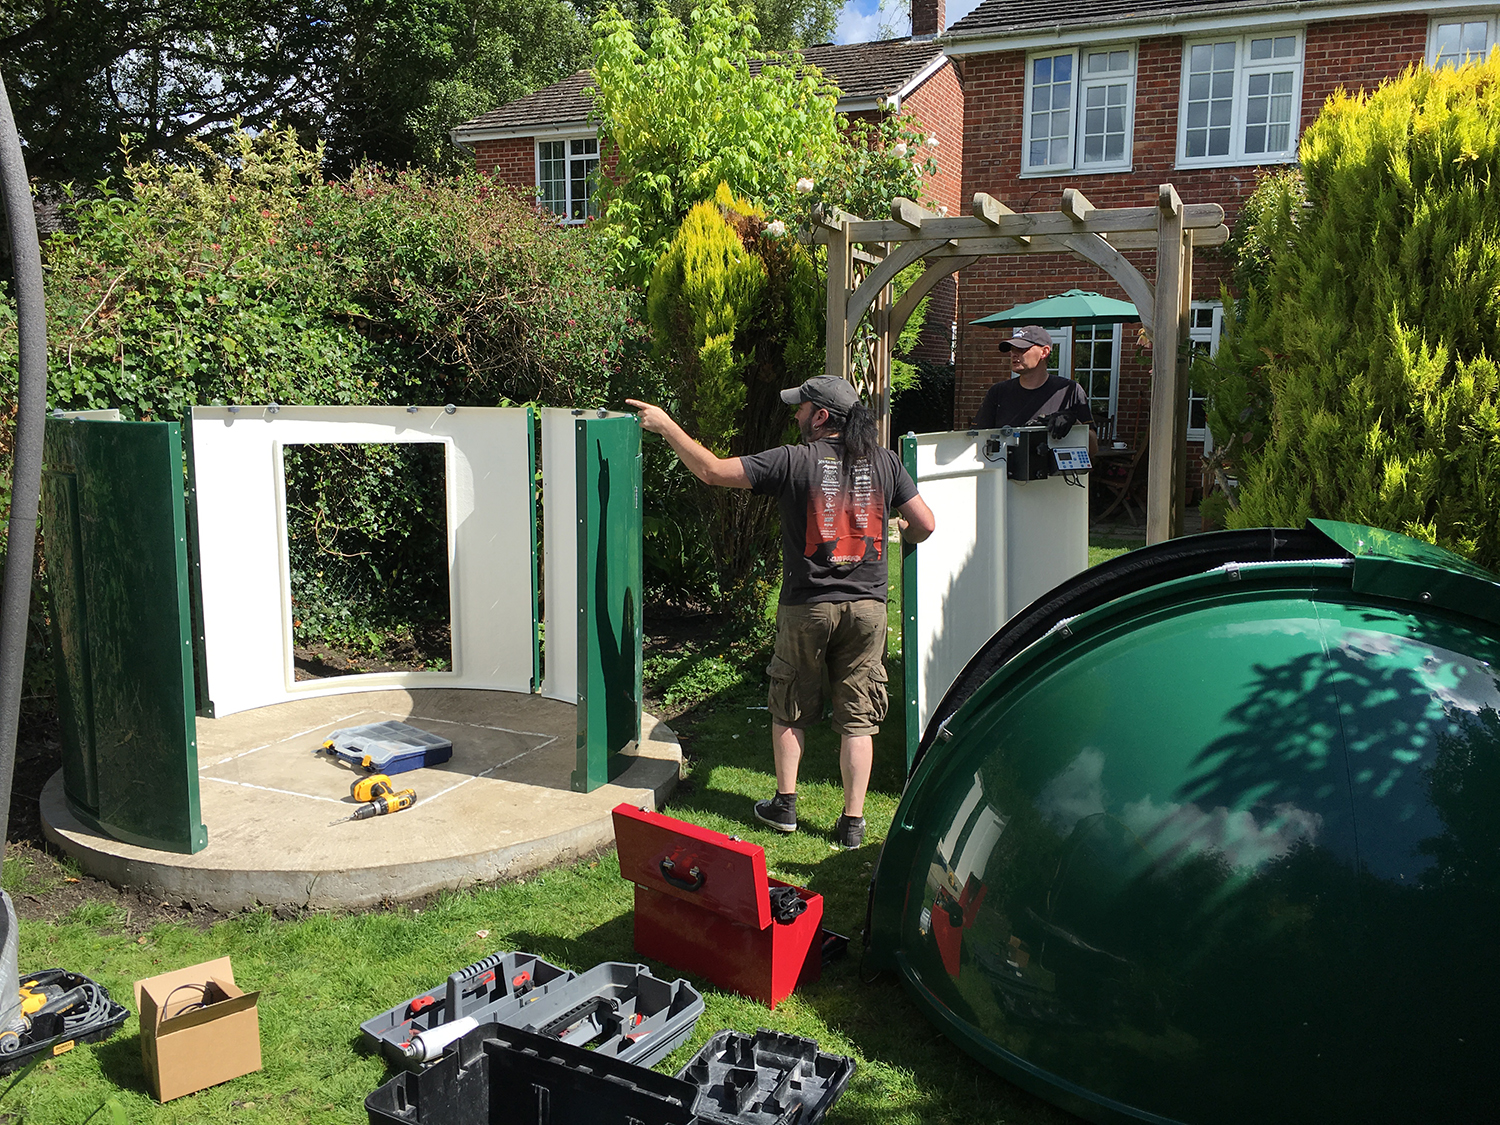
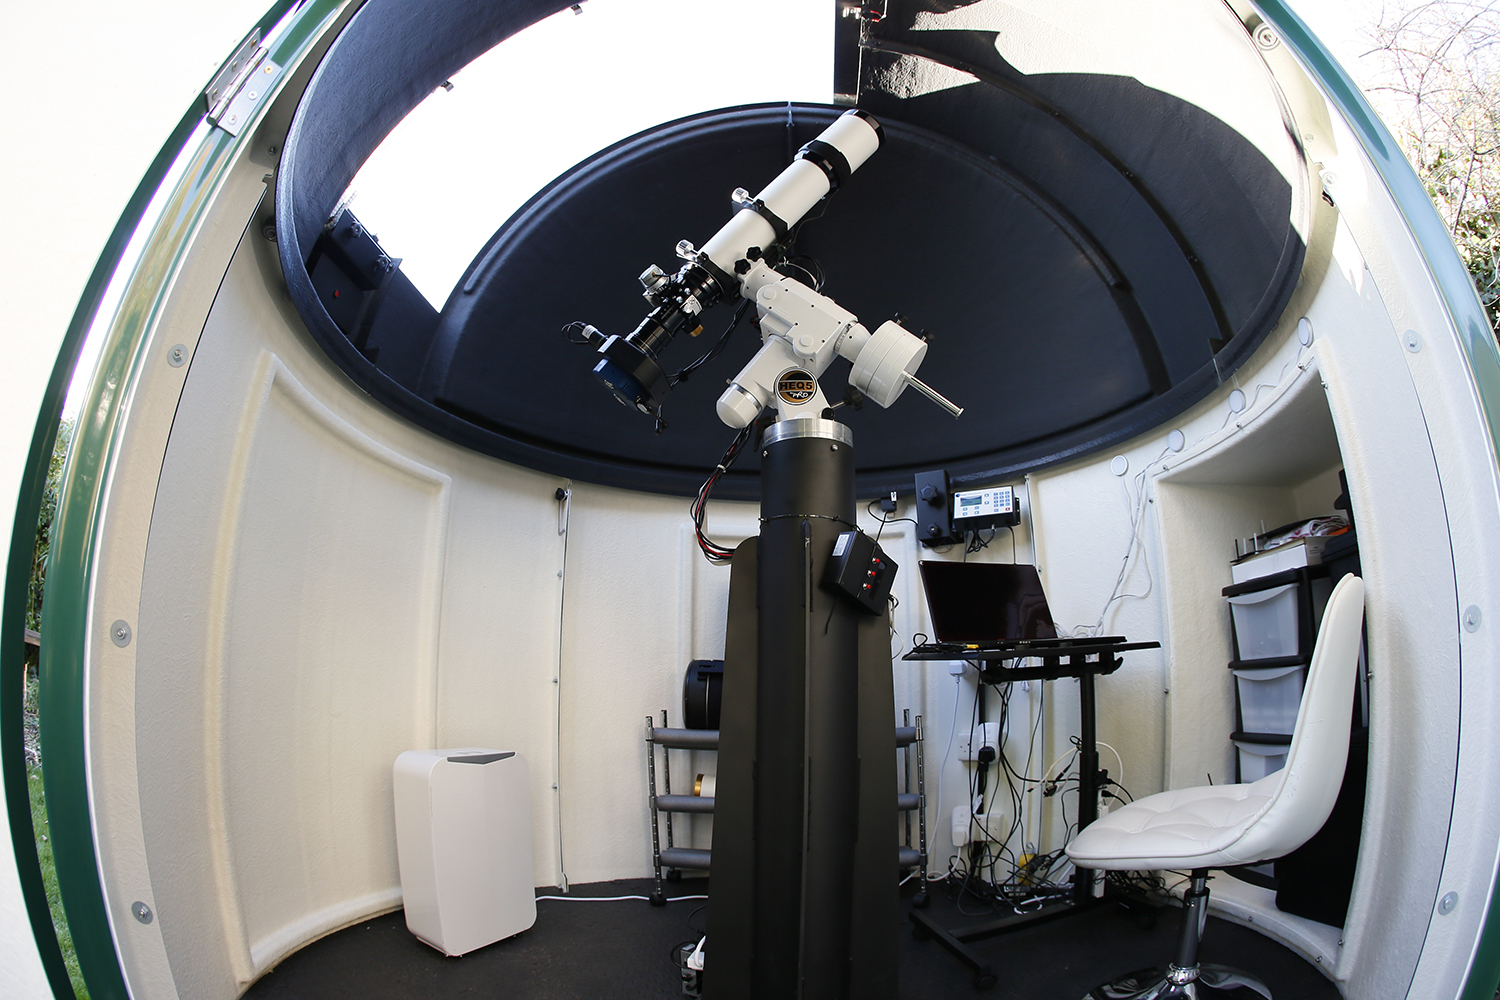
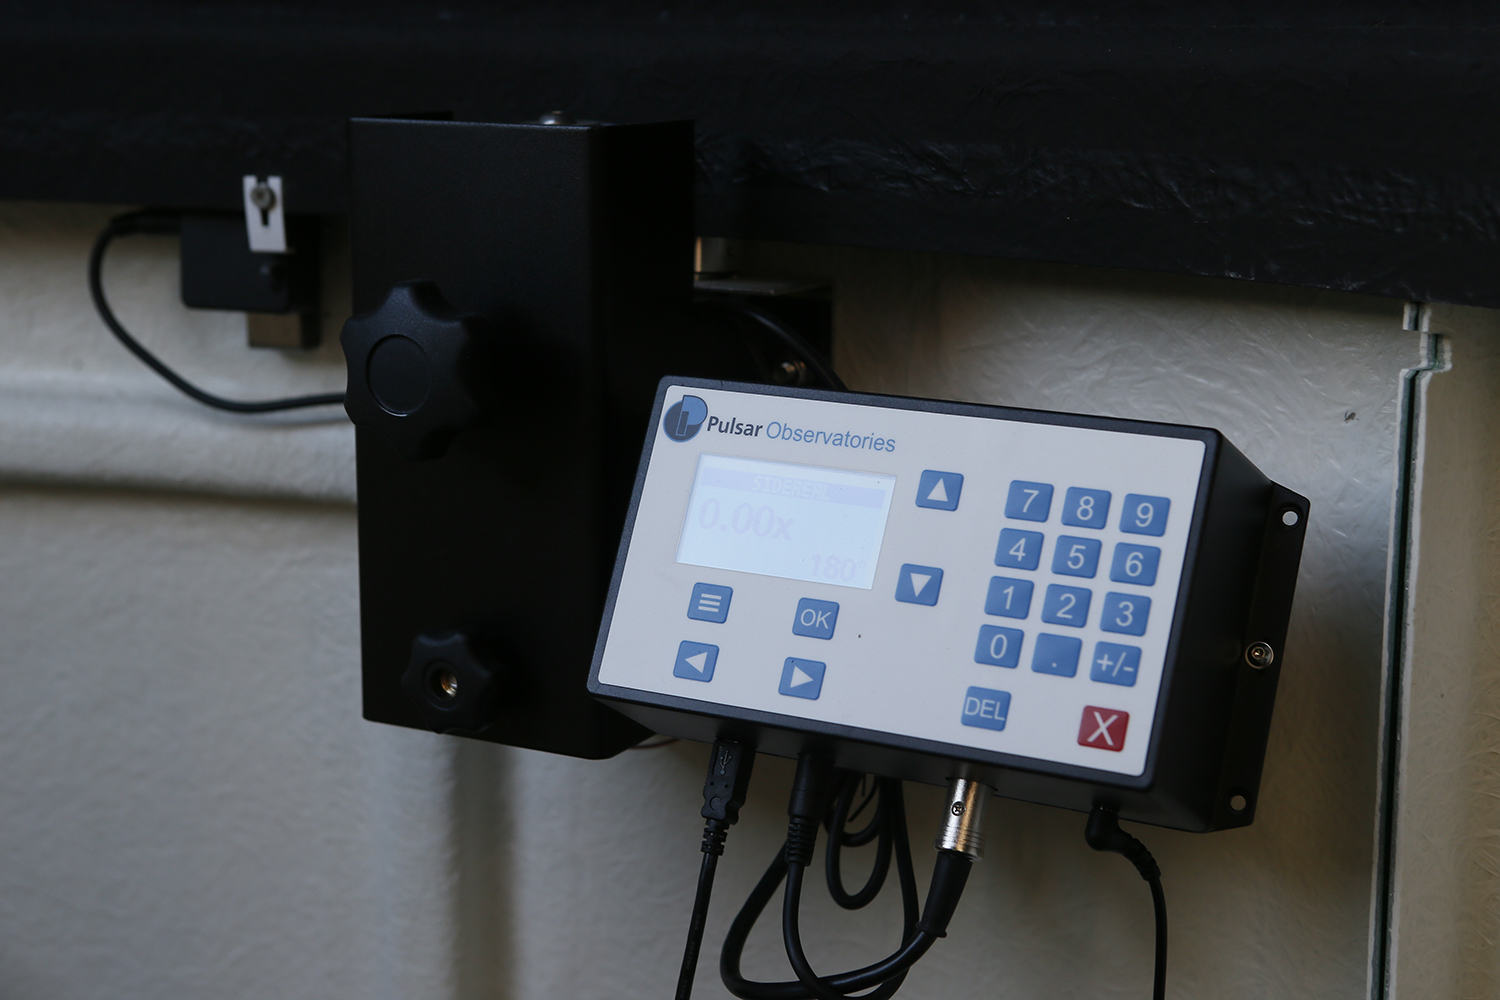
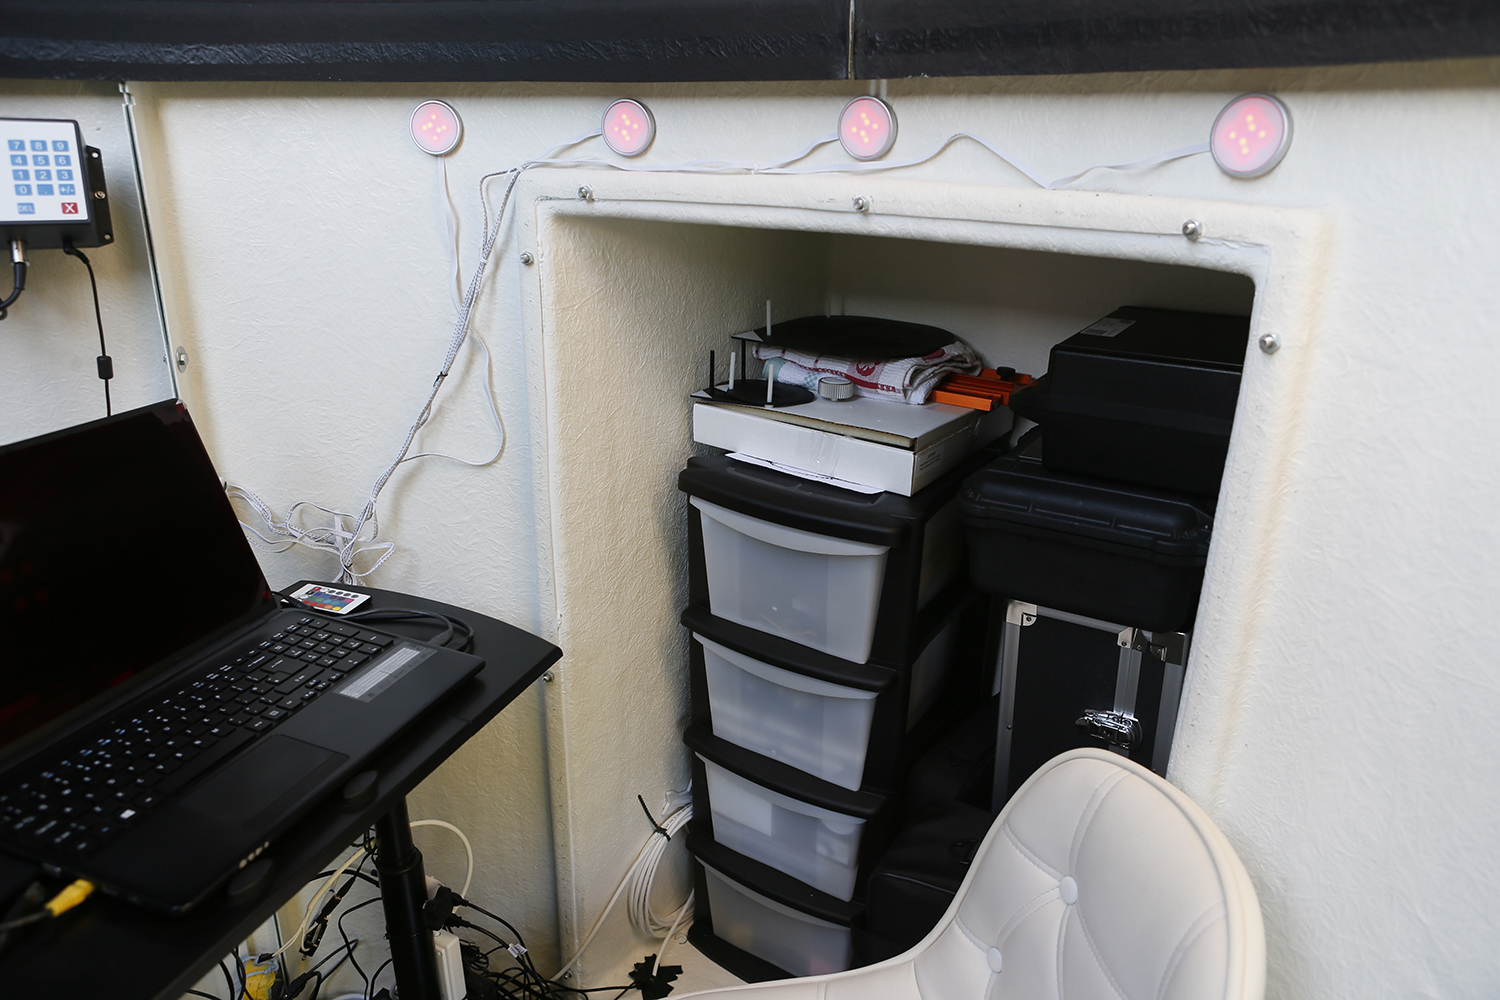
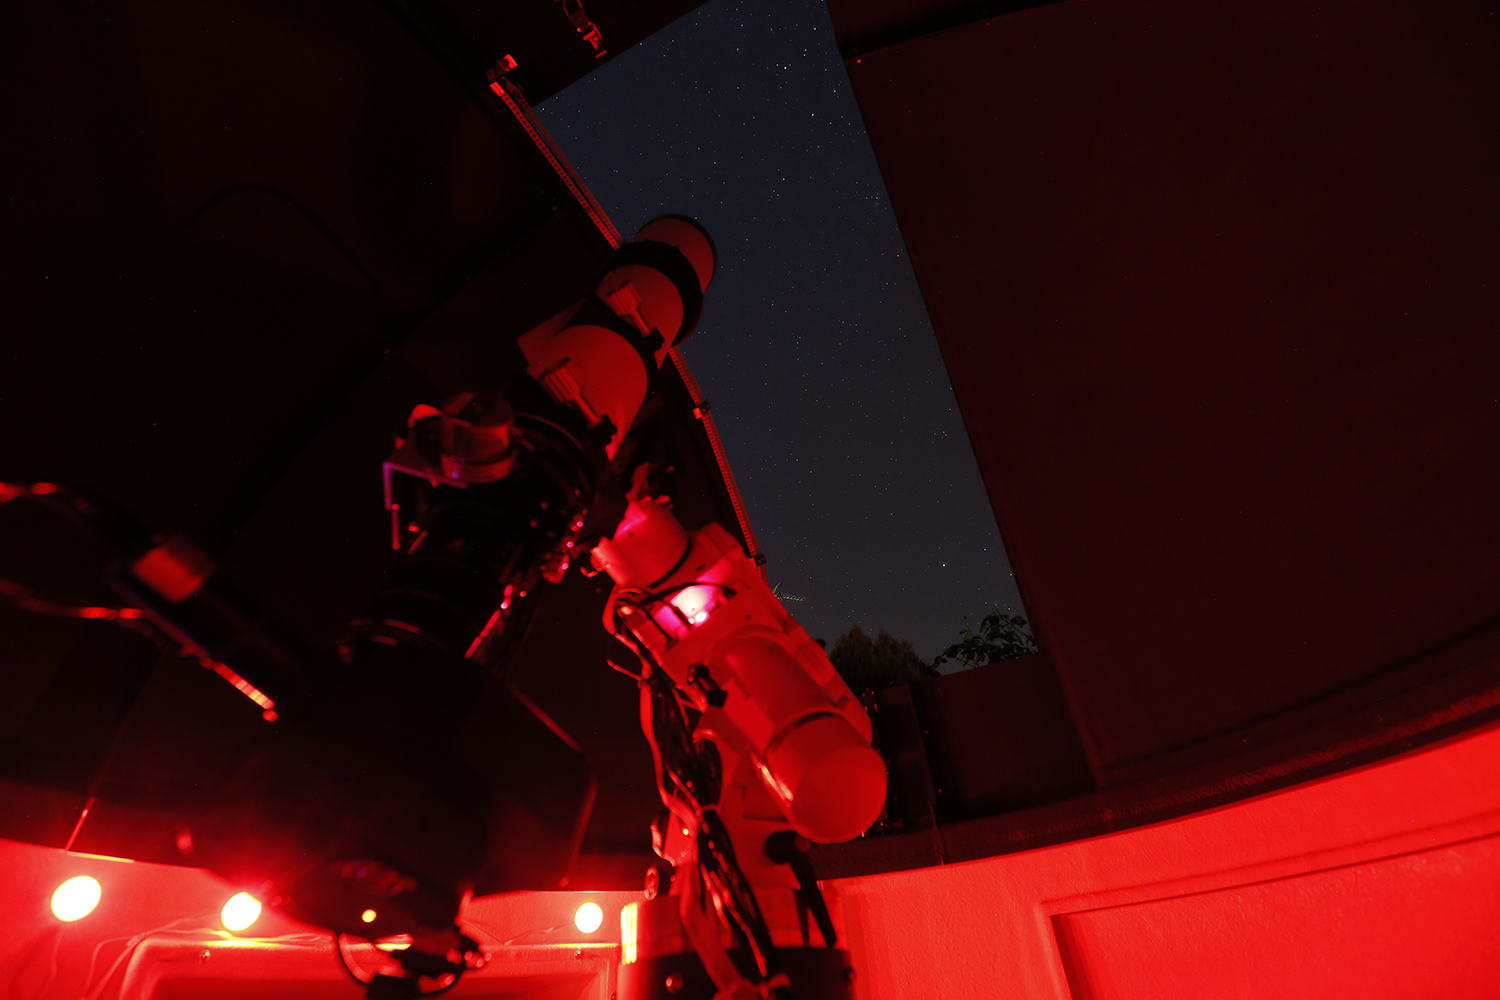
The Dome
The perfect home for all my astro gear - a 2.2m green Pulsar dome. The plan was to create a remote operable observatory that I could control from anywhere that has internet access. It has not been a totally smooth journey, but I now have what I set out to achieve. I have even been known to start up and monitor an imaging session from the dining table when invited round to friends on a clear dark night!
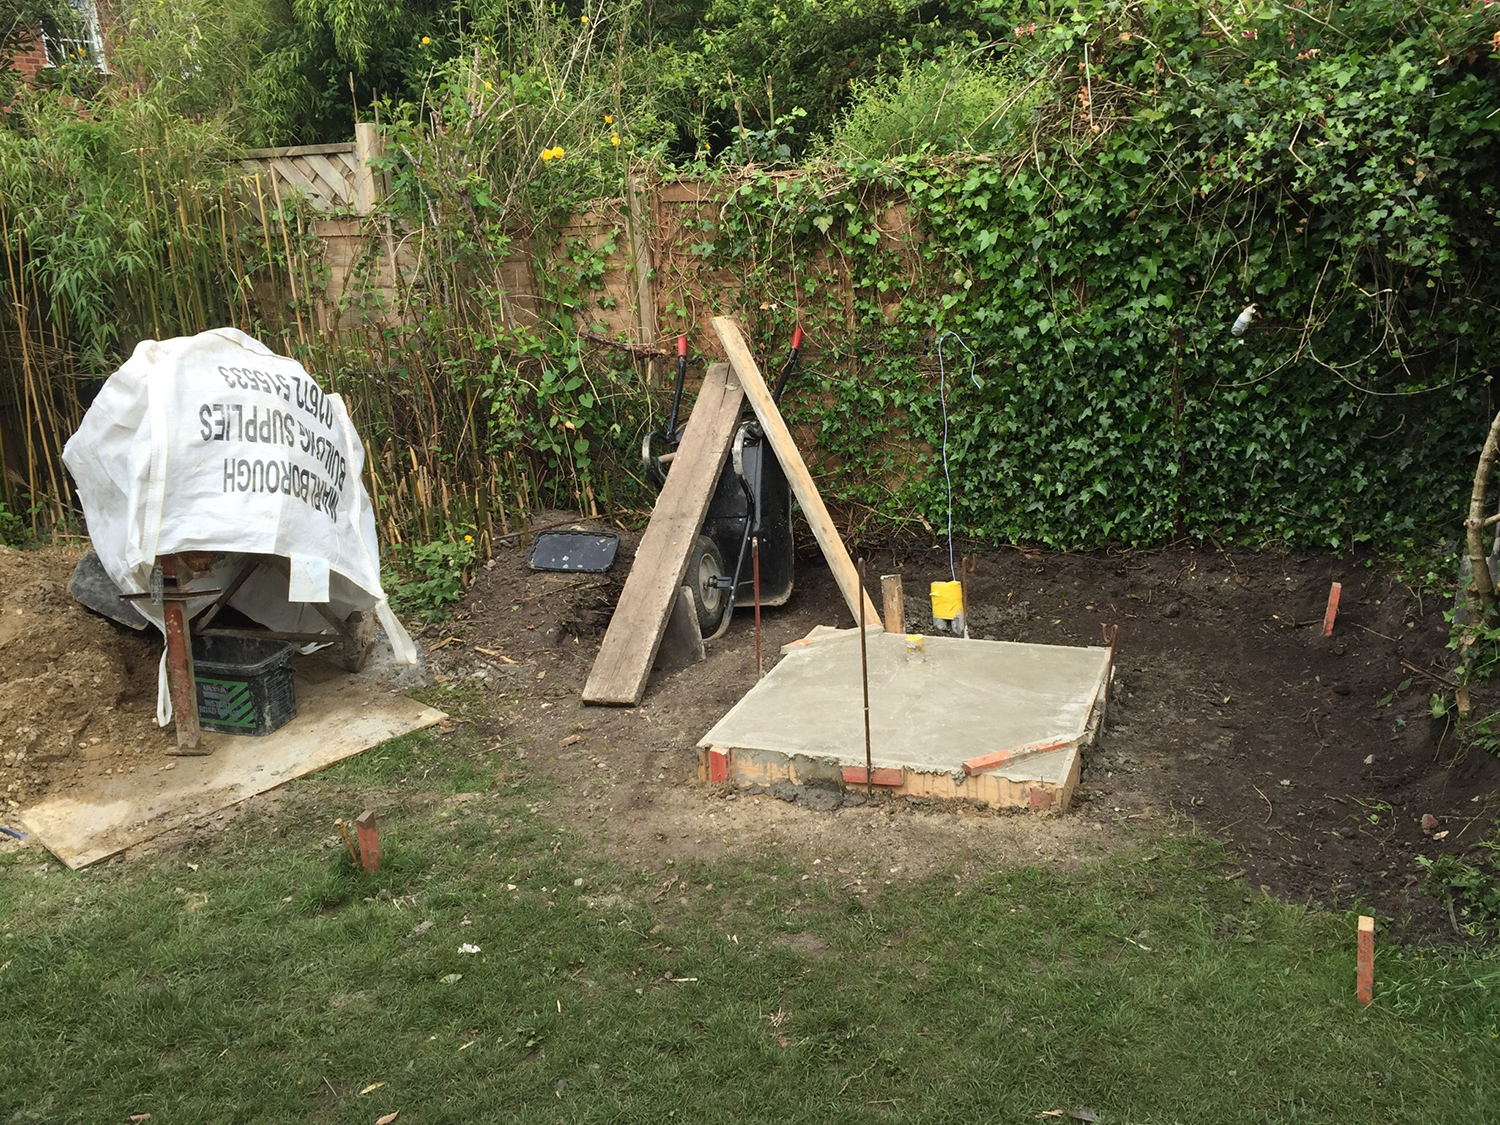
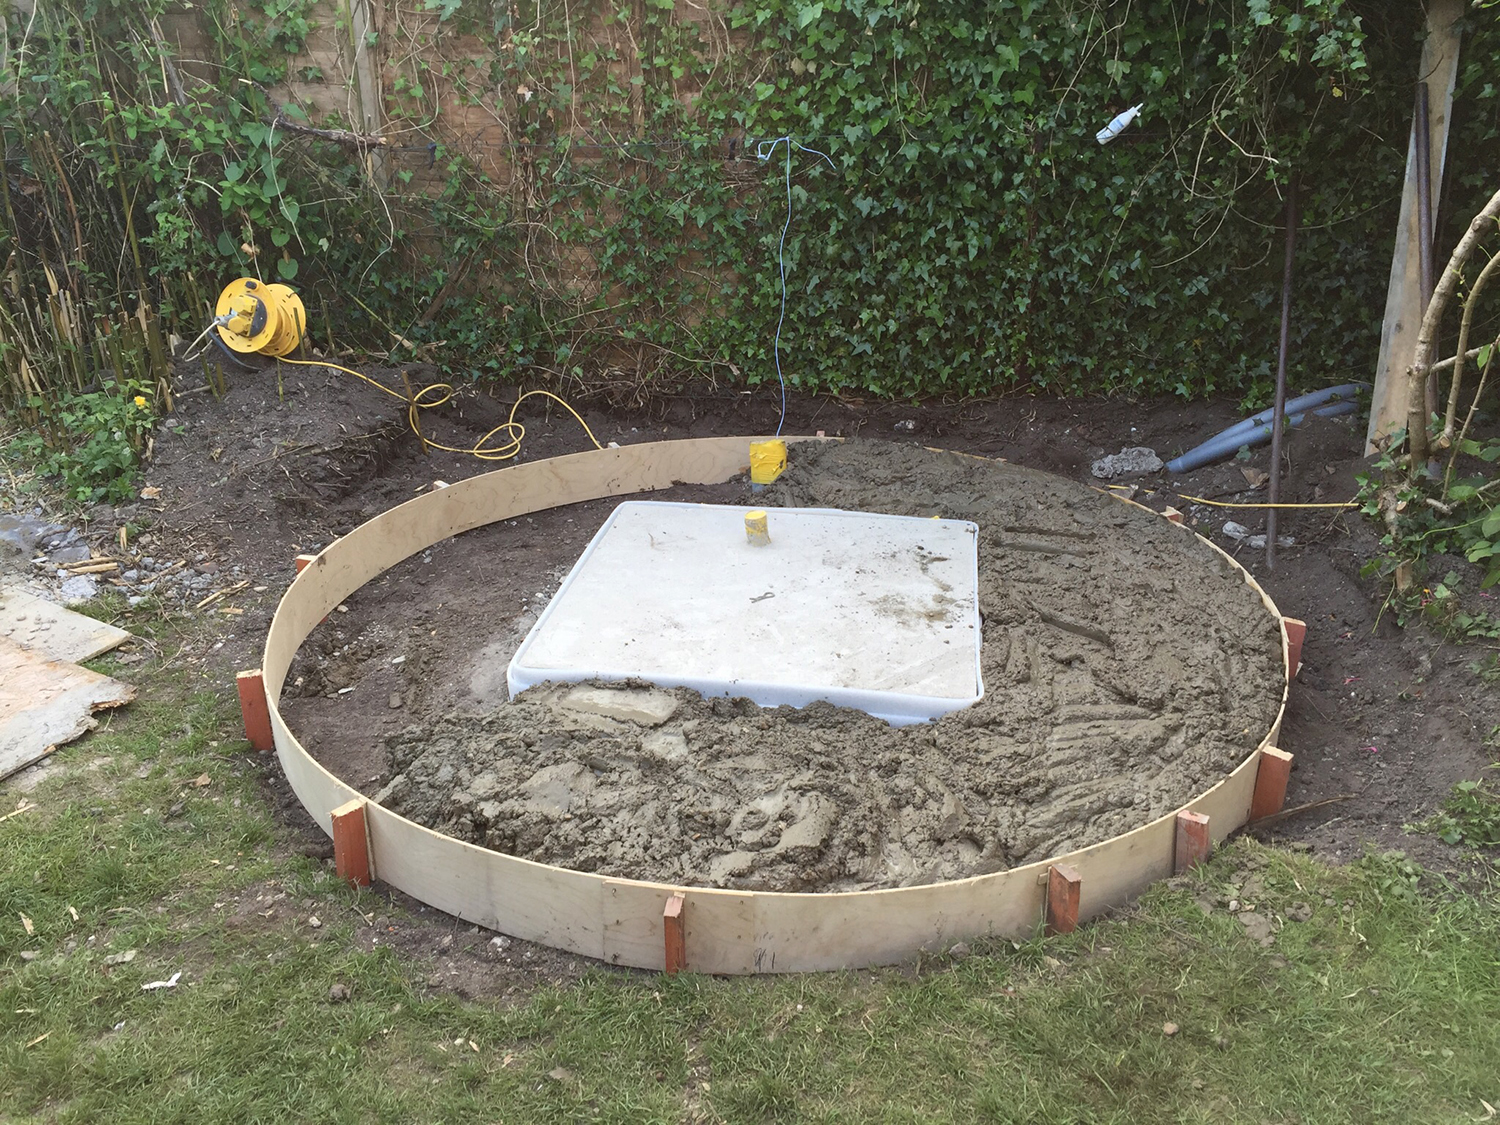
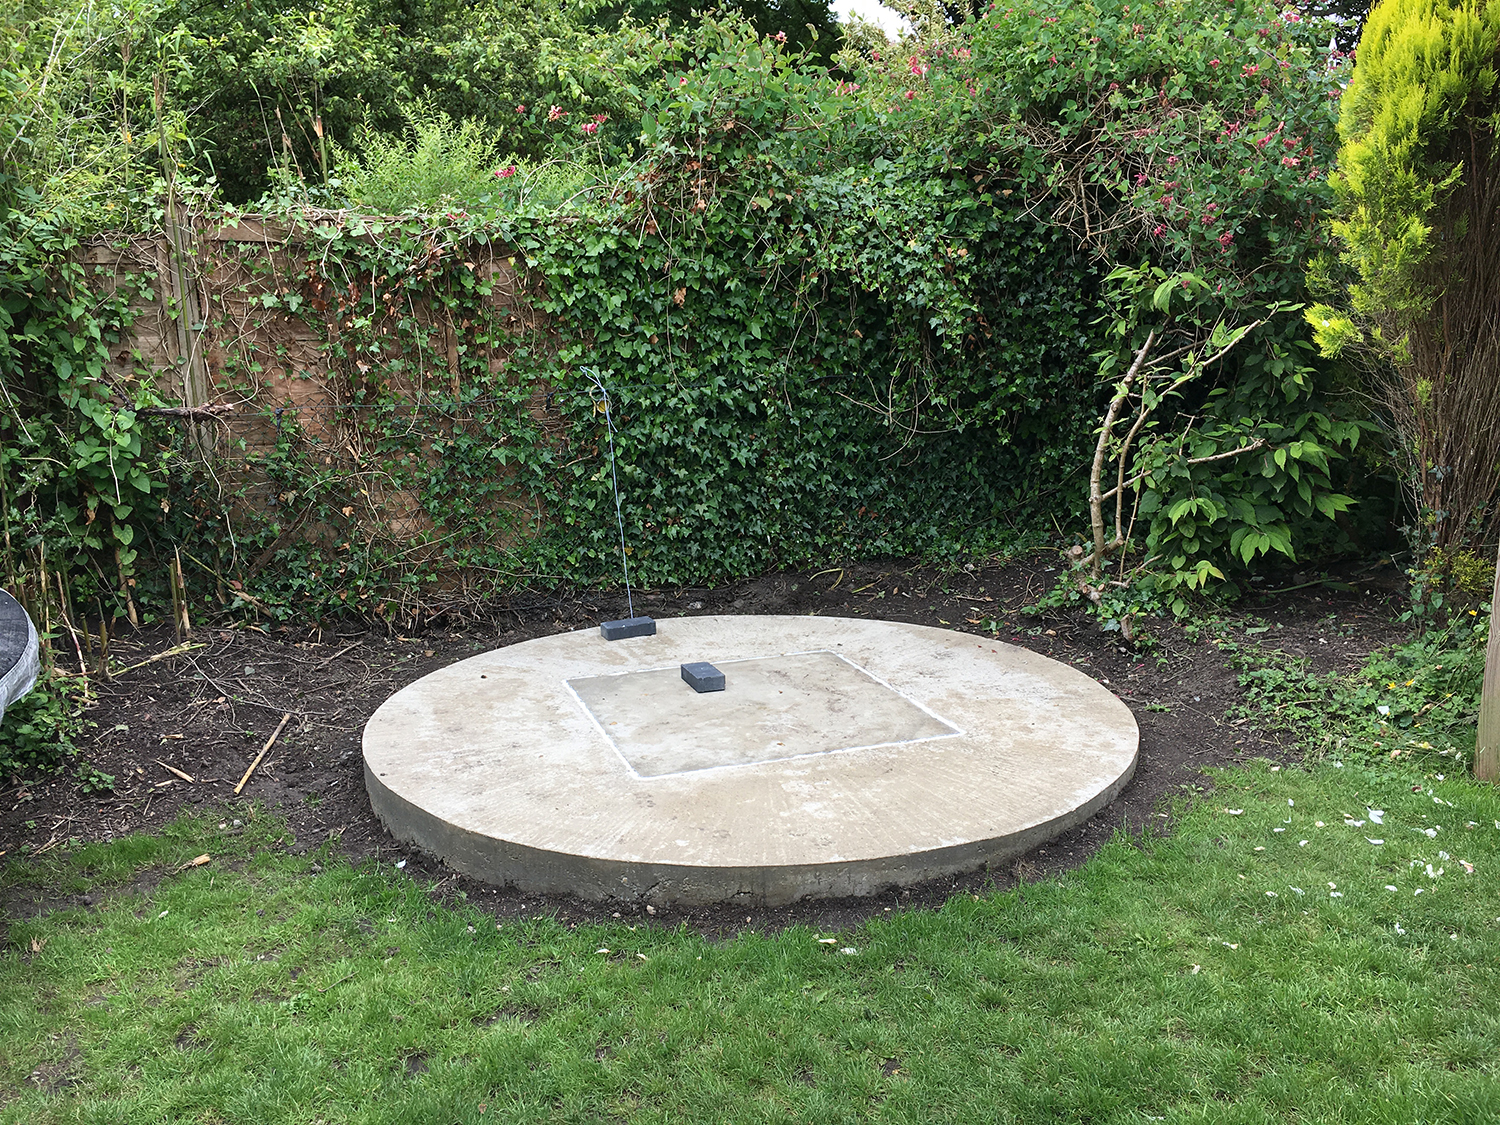
The first task was to choose a suitable south facing location, which involved a little gardening to make space. Next a metre cube concrete pier base was sunk along with an isolated 25cm round pad. The dome has a rotation drive and a shutter drive, linked in to the main computer. There is ample storage space for all the astro bits and bobs. I would hate to be without my dome now, it really does make the tricky pursuit of astrophotography just a little bit easier, or should that be 'less difficult'?! (pulsarastro.com)
Telescopes
Currently Owned
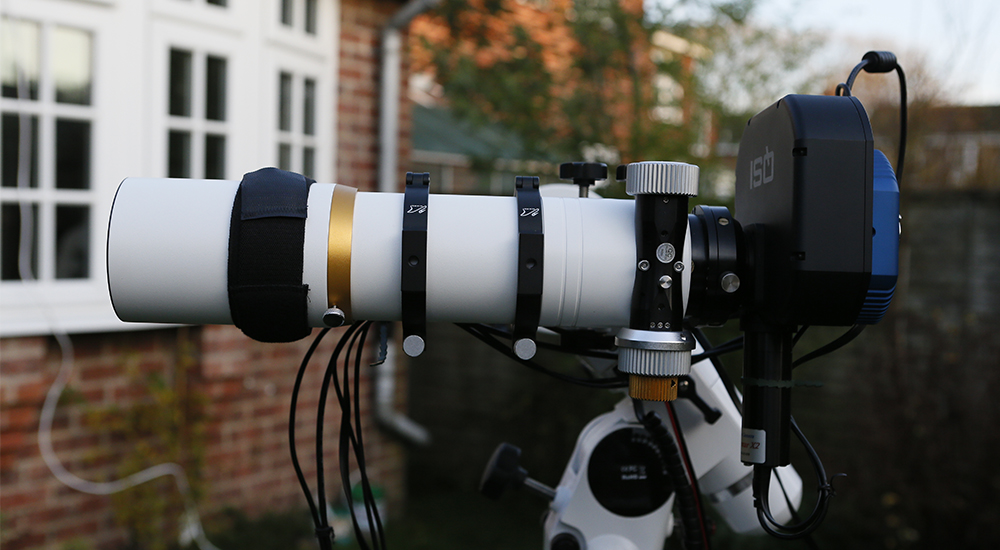
William Optics Star71 - Refractor
This is my 'widefield' scope with a focal length of 348mm. It has an aperture of 71mm (3 inches). It is reasonably fast at f4.9. I use this scope when I need to capture large areas of the sky. (williamoptics.com)
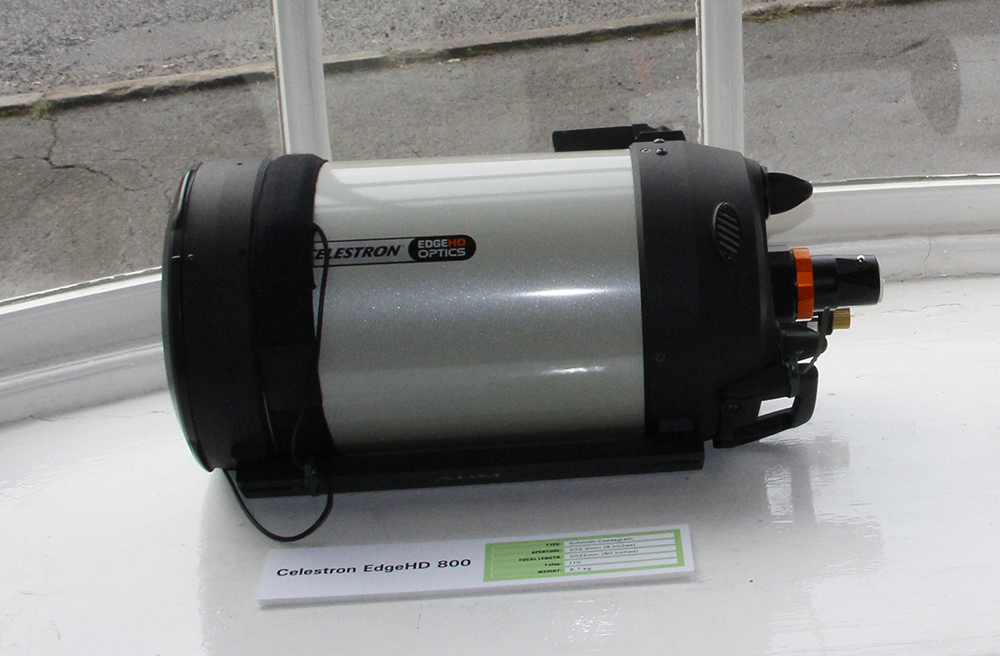
The 'big gun' with a native focal length of 2032mm and aperture of 203.2mm (8 inches). The drawback is that it is slow at f10. I also have the dedicated 0.7x Celestron Reducer, which gives a focal length of 1422mm at f7. This scope is great for the really small or distant (or both!) objects, such as galaxies and planetary nebulae. (celestron.com)
Lunt LS50THa - Refractor
This is my recently acquired (summer 2017) solar scope. It has a focal length of 350mm and aperture of 50mm (2 inches). The focal ratio is f7. It has a single interference etalon with bandpass of <0.75 Angstroms at 656nm (Hydrogen Alpha). The etalon can be altered with the internal pressure tuner. (luntsolarsystems.com)
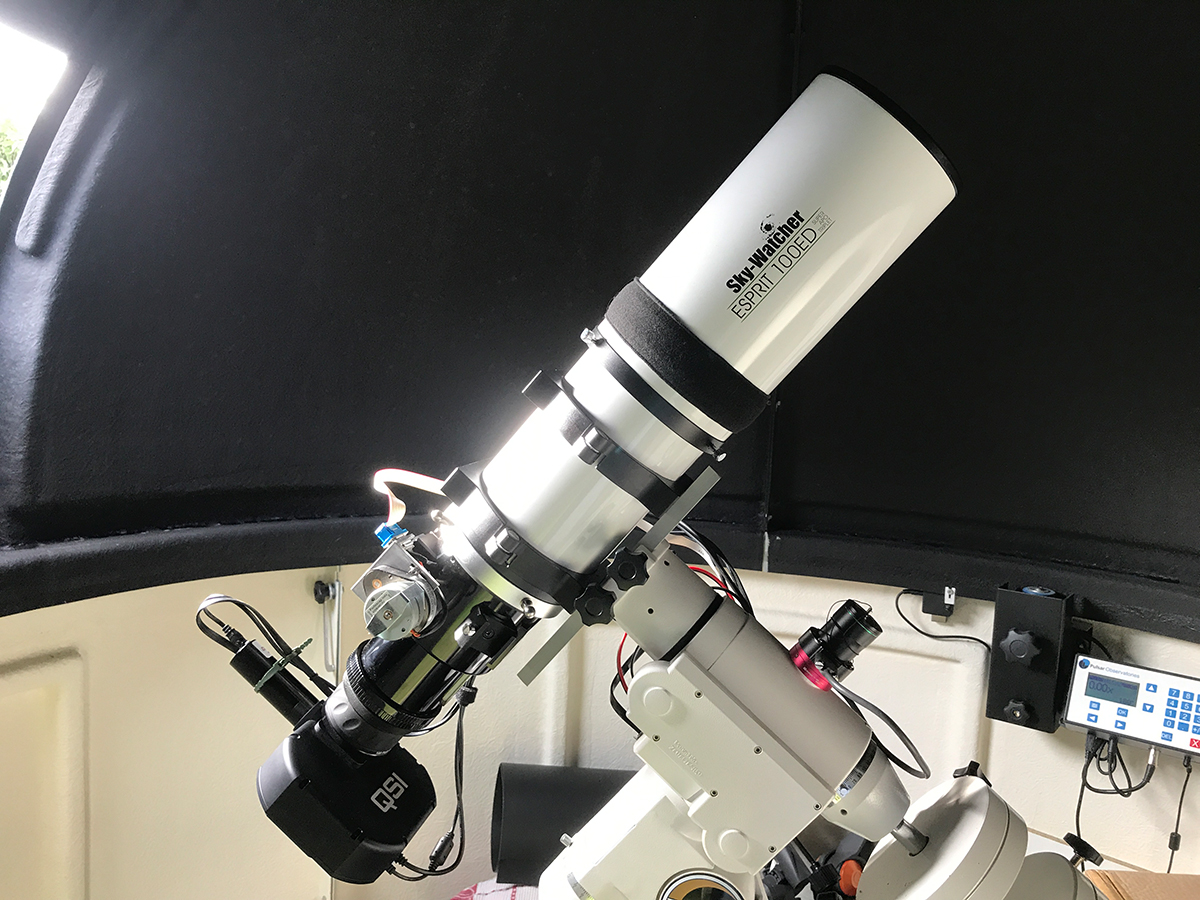
Sky-Watcher Esprit 100ED
After much deliberation about which telescope in the 520-560mm focal length range to purchase, I finally decided to go for the Sky-Watcher Esprit 100ED. It has a focal length of 550mm and focal ratio of f5.5. It will be perfect for those medium range objects such as clusters and galaxy groups. The scope comes highly recommended and represents excellent value. I look forward to putting it through its paces as soon as possible. (skywatcher.com)
Previously Owned
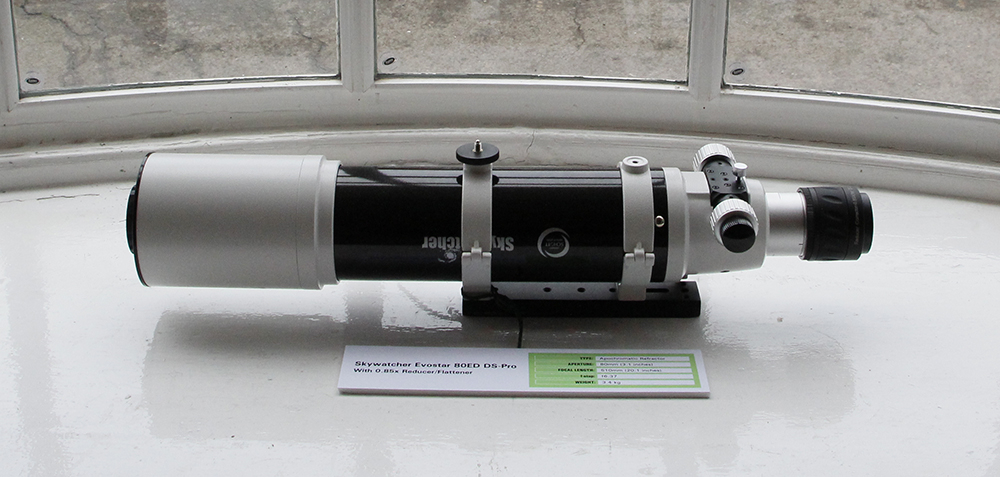
Skywatcher Evostar 80ED - Refractor
This was the first telescope I owned that was suitable for astrophotography. It has a focal length of 510mm and aperture of 80mm (3.1 inches), giving a focal ratio of f6.37. It is the telescope used for many of my images, but I decided that the focuser could be better, so traded it in for a more expensive telescope, see below... (skywatcher.com)
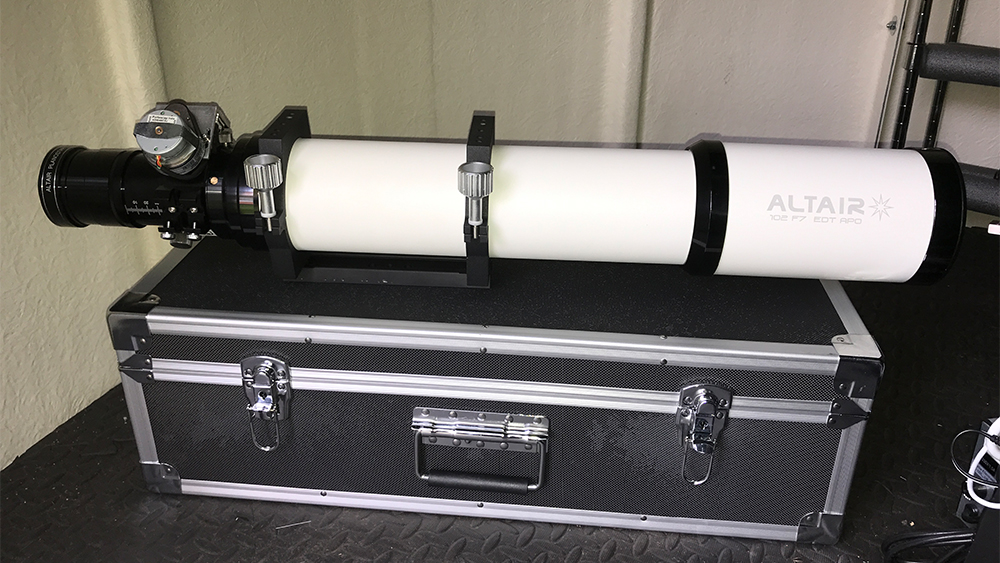
Altair Astro 102ED - Refractor
This is the scope that I purchased following the sale of the Skywatcher 80ED (above). It has a focal length of 710mm, aperture of 102mm (4 inches) and focal ratio of f7. I used it with a 0.79x reducer to give a focal length of 565mm at f5.5. Unfortunately I didn't keep this telescope for very long as I found that it didn't handle bright stars efficiently at all. I am still searching for its successor. (altairastro.com)
My first 'proper' telescope was a Helios Newtonian reflector, which my parents gave me one Christmas many years ago. I explored far and wide with that scope, but as my desire to photograph what I saw increased, I realised that it was not the right telescope for that job. A couple of days after my eldest child was born, while sitting at home thinking of my wife and new son in hospital, I had an epiphany - I needed a better telescope and I needed it now. So, I immediately purchased a second hand Meade ETX 105. This was a definite step up from the Helios, with a motorised mount, a GoTo handset and a T-adapter to connect my camera to the back. However, despite having some wonderful views through the telescope and managing to photograph the Moon, it became apparent that this wasn't the most suitable telescope for astrophotography either. A few years passed and then I won a photography competion, for which the prize was a cheque for £1000. I decided to spend it on a Skywatcher HEQ5 Pro mount and Skywatcher Evostar 80ED telescope - and thus my astro imaging career commenced!
Cameras
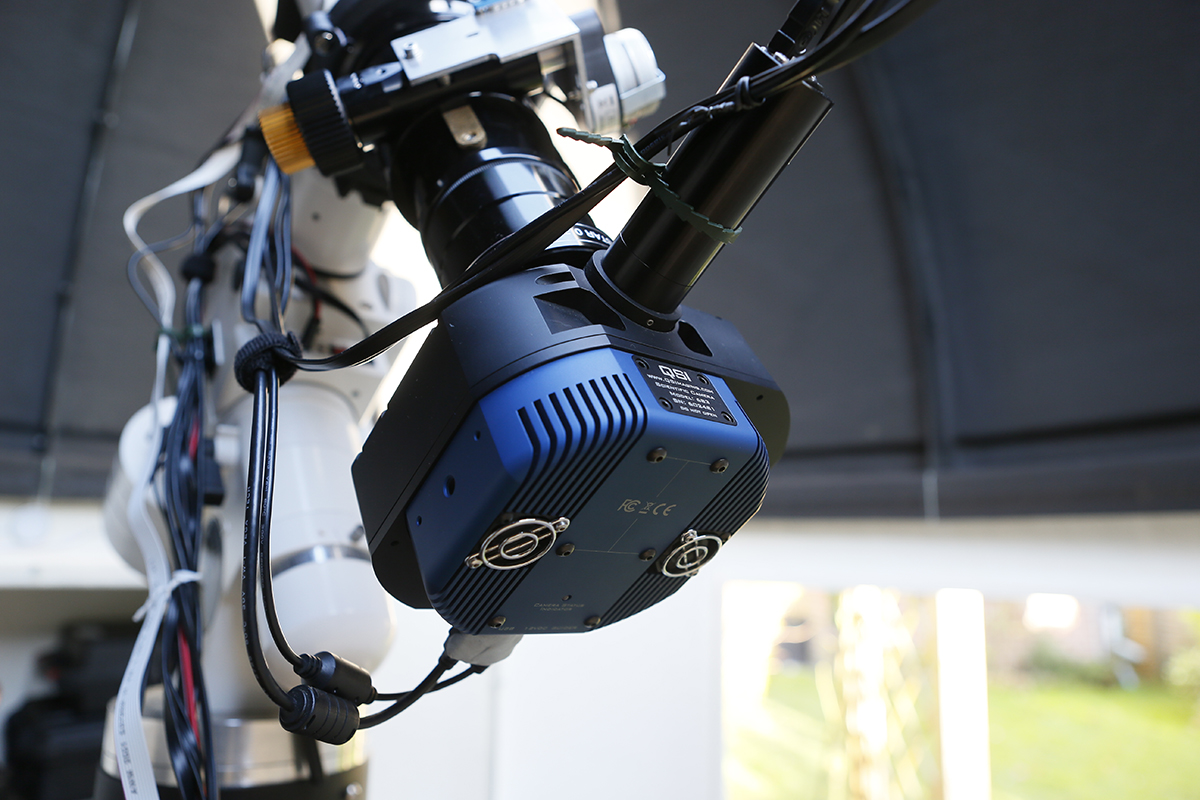
QSI 683-WSG8
My main imaging camera is the superb QSI 683. It is extremely well built and the detail possible with the Kodak KAF8300 chip is incredible. It is a mono CCD with 3326 x 2504 5.4μm pixels. It has an integrated 8 position filter wheel and an off axis guider port. I currently use 31mm Astrodon filters. The chip can be air cooled to 45°C below ambient and I am able to run the chip at -20°C all year round. (qsimaging.com)
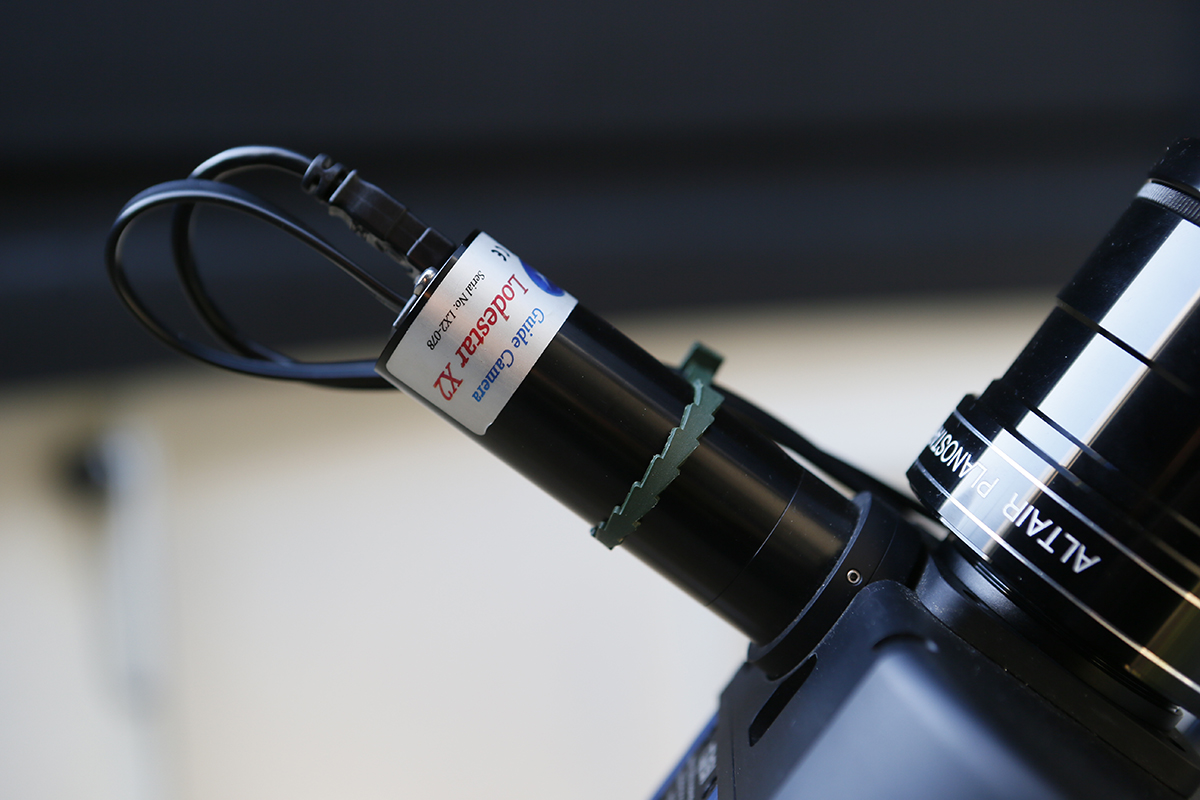
Starlight Xpress Lodestar X2
This is the guide camera connected to the off axis guider port on the QSI camera. It is extremely sensitive and has not failed to find a star to guide on yet, even in the relatively star free fields surrounding some of the galaxies that I have imaged. (sxccd.com)
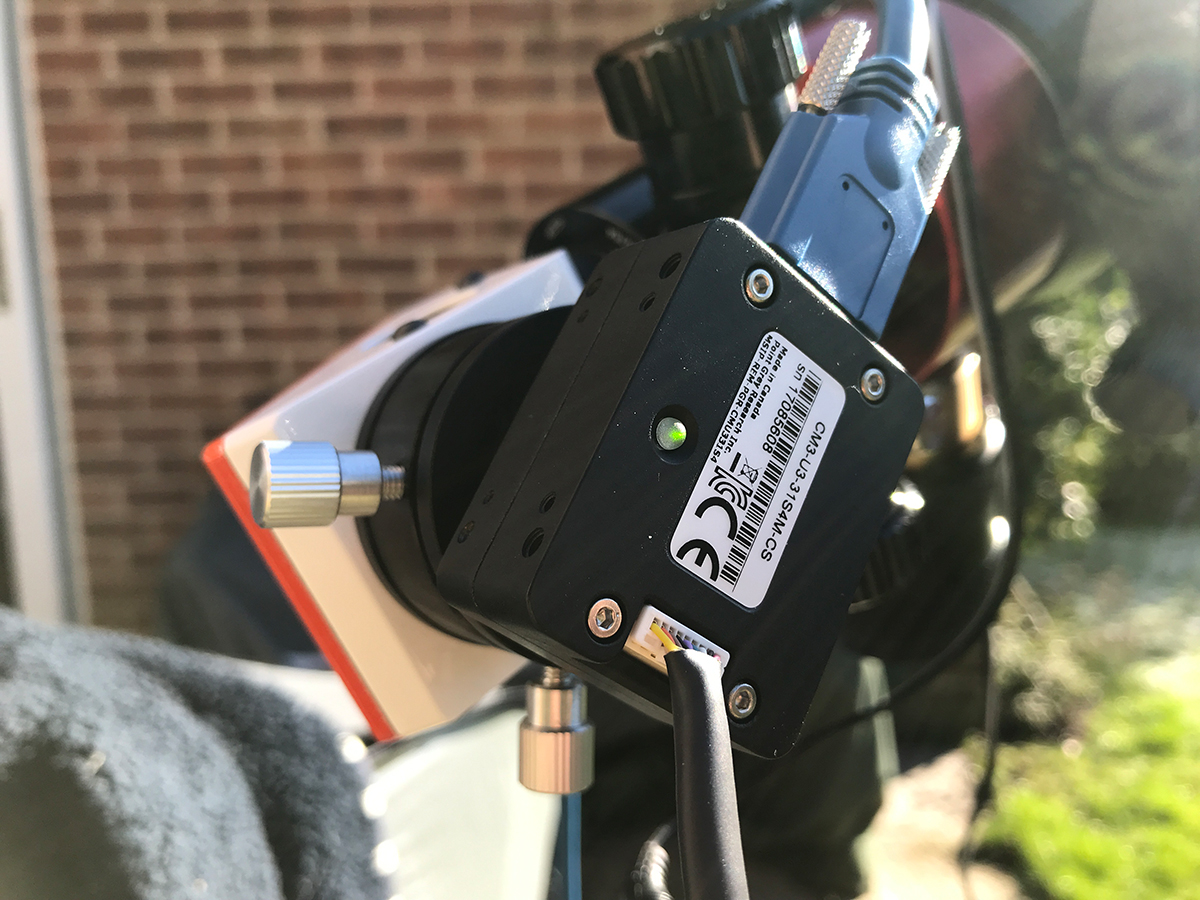
Point Grey Chameleon 3
My most recent camera purchase, the USB3 high frame rate Chameleon 3. It is based on the Sony IMX265 CMOS mono chip, capable of 55 frames per second at 2048 x 1536 3.45μm pixels. It's only a small unit, but performs fantastically well with the Lunt solar scope and gives me the quality of solar images that I have been aiming for. (ptgrey.com)
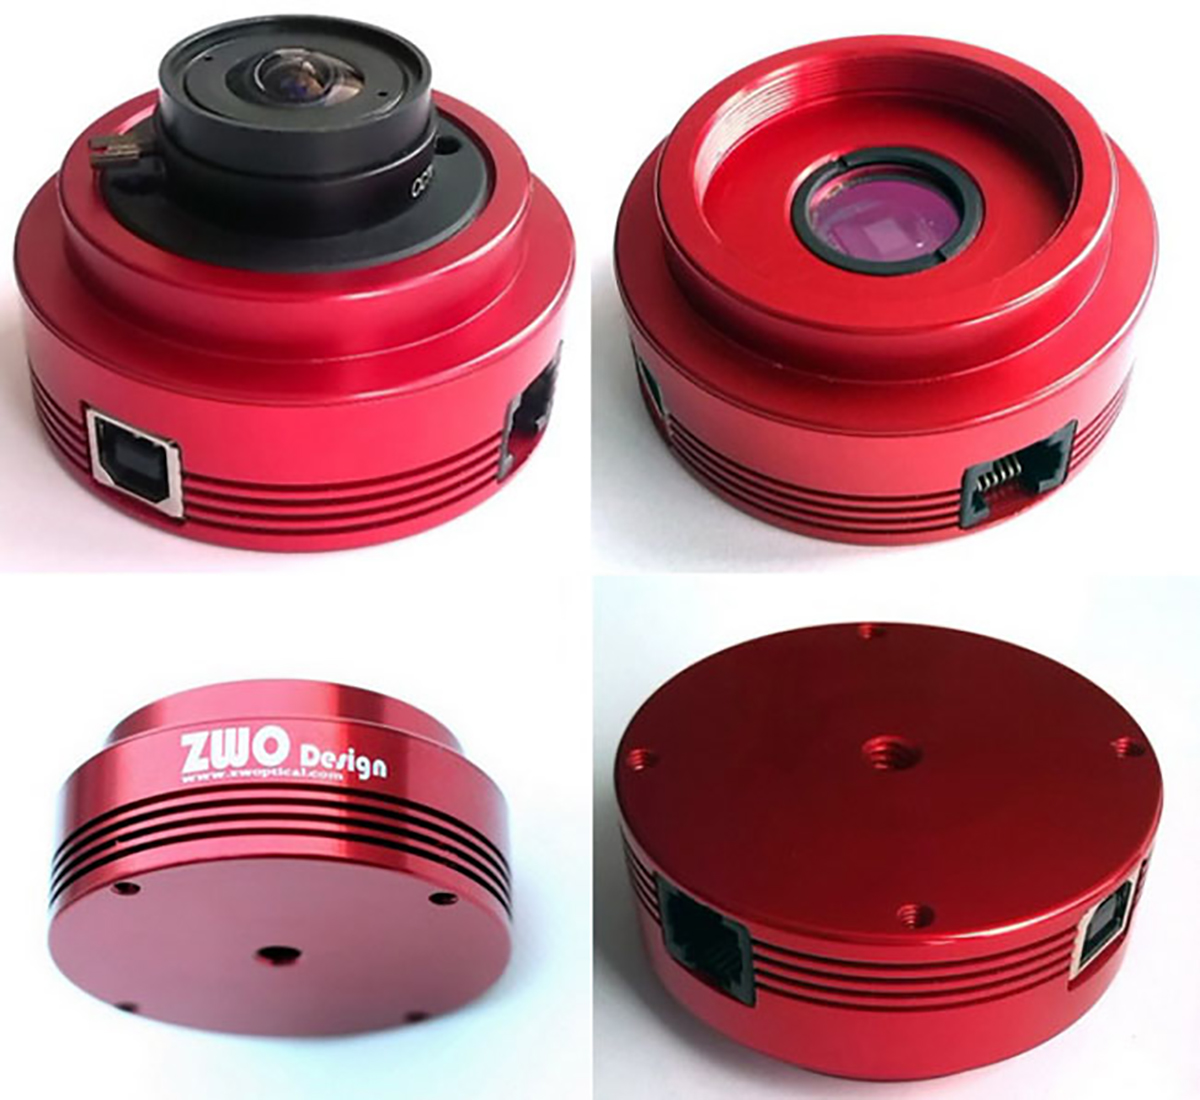
ZWO ASI120MC-S
This is the first planetary camera that I purchased. It is a one shot colour chip that can perform at 60 frames per second at 1280 x 960 3.75μm pixels. It is a very good value camera, but the Chameleon 3 easily out performs it. (zwo.com)
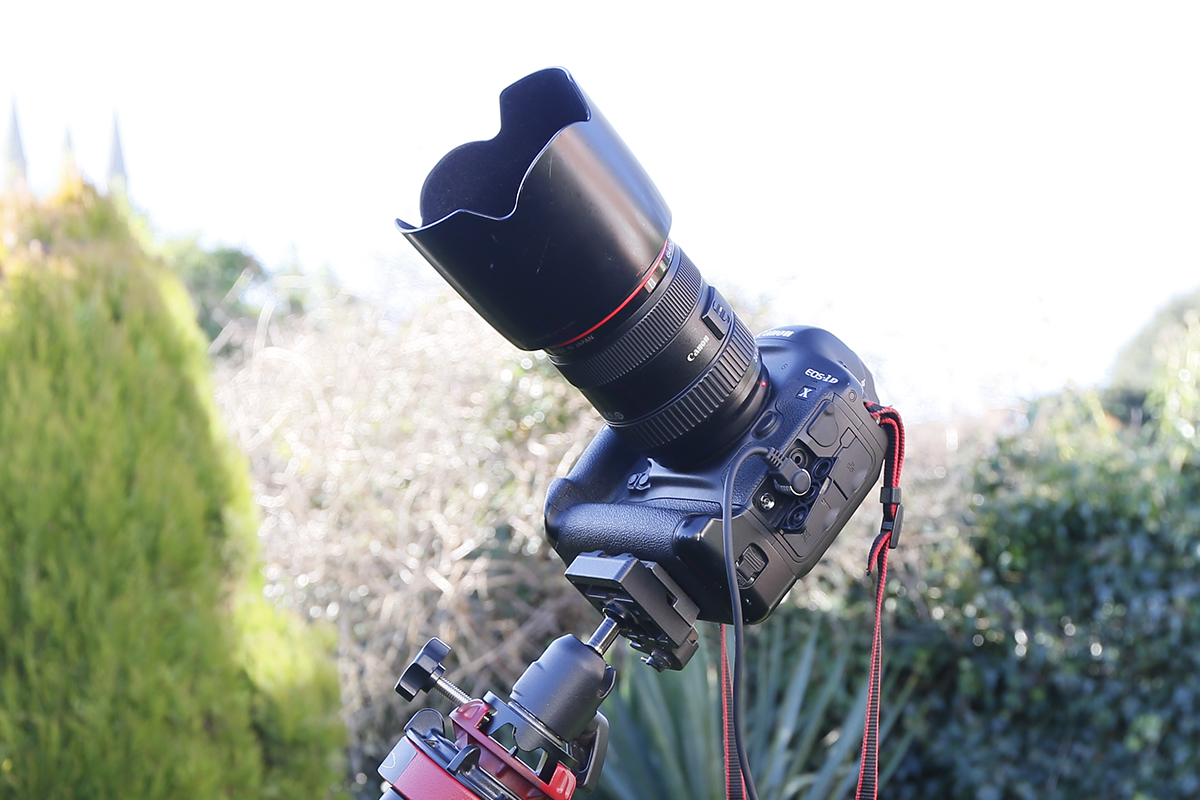
Canon
I have various Canon DSLRs, including a Canon 60D that I used in the early days of astroimaging that I modified myself. Modification for astronomical use is when the cut filter in front of the chip is removed to allow all the red light through to be imaged. This dramatically improves the response to areas of hydrogen alpha. Nowadays I only really use my Canon 1Dx cameras for widefield imaging with wide lenses of around 15mm. (canon.co.uk)
Mounts
Mesu 200
The Mesu 200 is a recent upgrade to the RPO system, made in November 2018. After much research a couple of years ago I decided that the ultimate mount for what I am doing would be the Mesu 200. When one came up for sale second-hand on UK Astro Buy & Sell, I just couldn't resist. It is a spectacular piece of engineering and is a huge step up from the HEQ5. The tracking performance of the Mesu is outstanding and the load capacity is insane! It can carry up to 75kg of kit, huge compared with the 11kg limit of the HEQ5. I am using a side-by-side mount bar so that I can simultaneously mount my Lunt solar scope, always ready for solar action. This upgrade is rapidly moving me towards a situation where the limiting factor to the quality of my images is no longer equipment, but sky quality. There's not a whole lot I can do about that in Wiltshire! (mesu.nl)
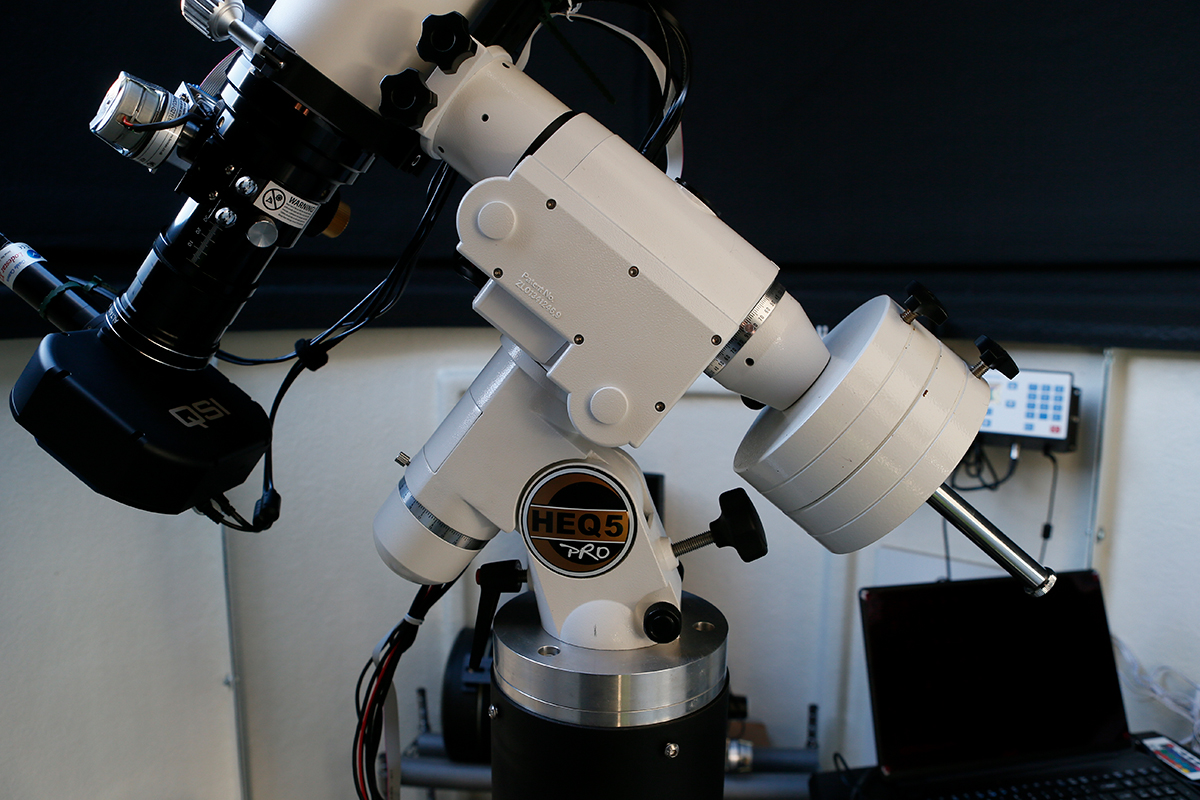
Skywatcher HEQ5 Pro
The original mount that I used for many years in the garden and in the RPO is a Skywatcher HEQ5 Pro. Really it is only an entry level mount that is just about capable of tracking accurately enough for deep sky astrophotography when guided. I have done the Rowan Belt modification to the mount, which improves its performance. I am continually amazed by the results acheivable with this relatively inexpensive mount. (skywatcher.com)
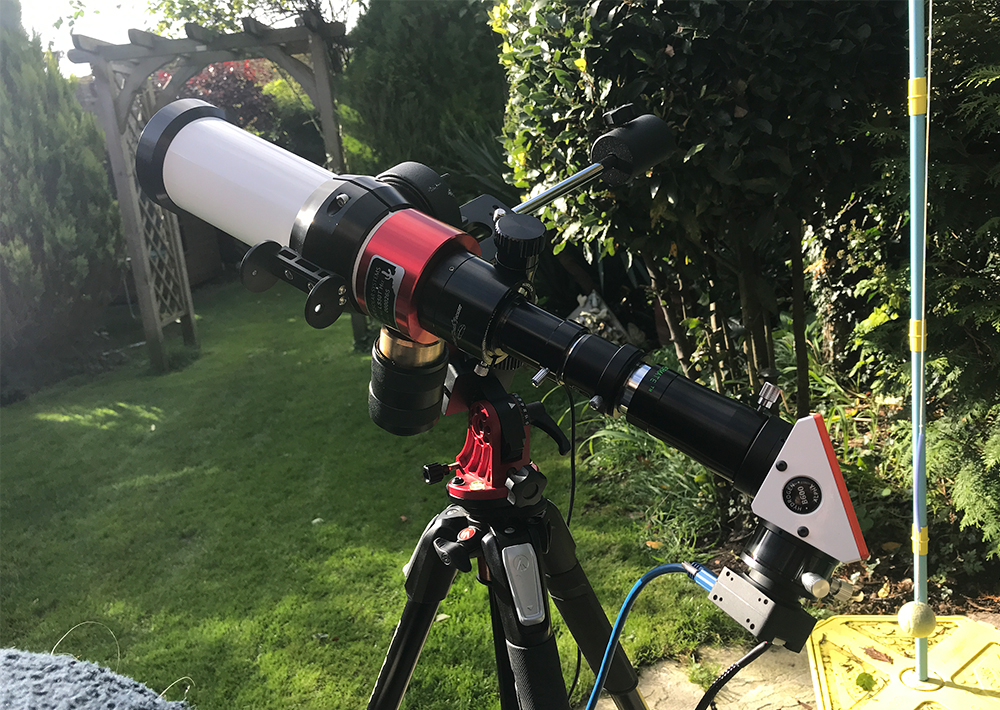
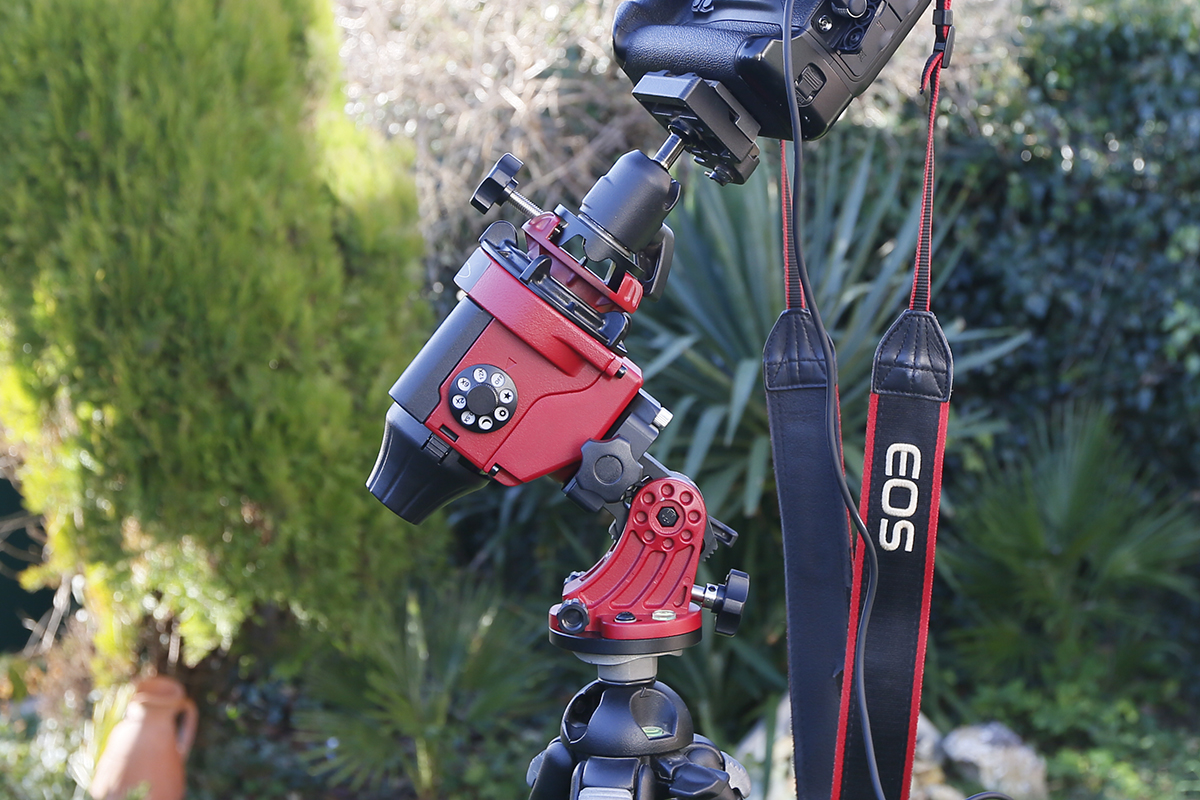
Skywatcher Star Adventurer
The HEQ5's little sibling is this Star Adventurer mount from Skywatcher. It is designed primarily as a travel mount and indeed, it has been all over the country and abroad with me. It tracks reasonably efficiently when well polar aligned and is ideal for wide field photography, where three minute unguided exposures are perfectly possible. I have enjoyed using it to create time lapse sequences, both of the night sky and of daytime landscapes. It sits on top of a sturdy Manfrotto 055 tripod. I also use this mount with the Lunt solar scope. (skywatcher.com)
Support Systems
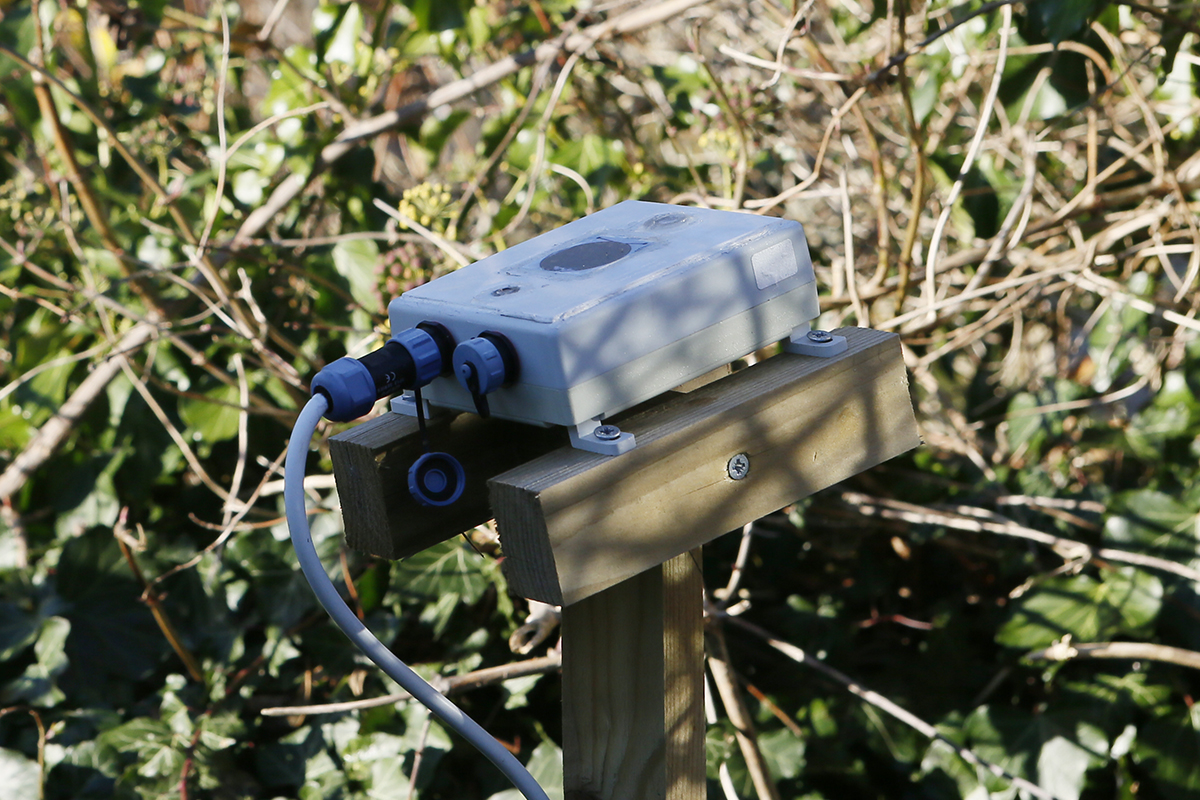
AAG Cloud Watcher
Located on a custom built pole outside the RPO is an essential piece of safety equipment, an AAG Cloud Watcher from Lunatico Astronomia. This device has three sensors on it; a brightness sensor, a moisture sensor and an infrared sensor. It is plugged into the observatory PC and monitors the environment outside. I have it set so that if it senses cloud or rain, the system will shut the observatory, keeping all that kit safe and dry - phew! (lunatico.es)
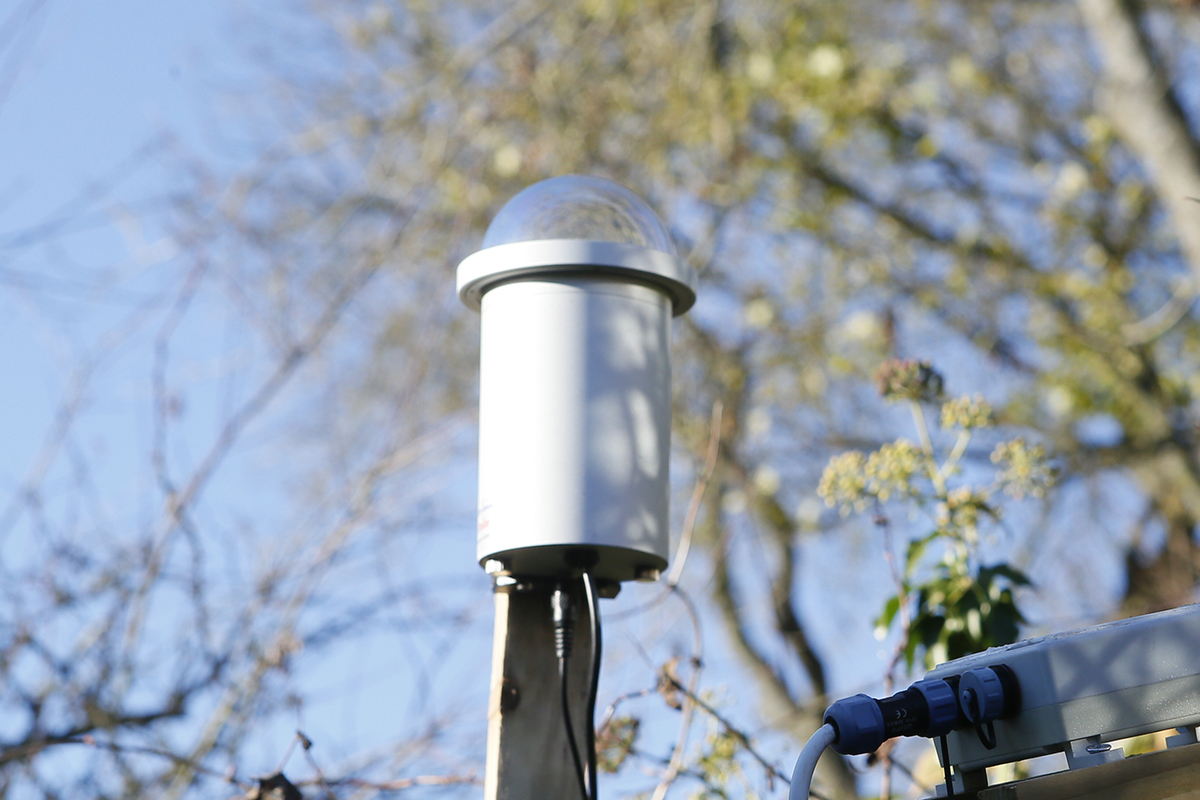
Starlight Xpress Oculus
My eye on the sky is a Starlight Xpress Oculus all sky camera. This sits on another custom mounting (piece of wood stuck in the ground!) outside the RPO and looks up through its acrylic dome with a SuperStar sensor and 150° lens. I use the fantastic AllSkyEye software to operate the camera and can monitor exactly what sky conditions are like. It is also very useful to be able to check that the dome has indeed closed at the end of a session. (sxccd.com)
Lakeside Motor Focus System
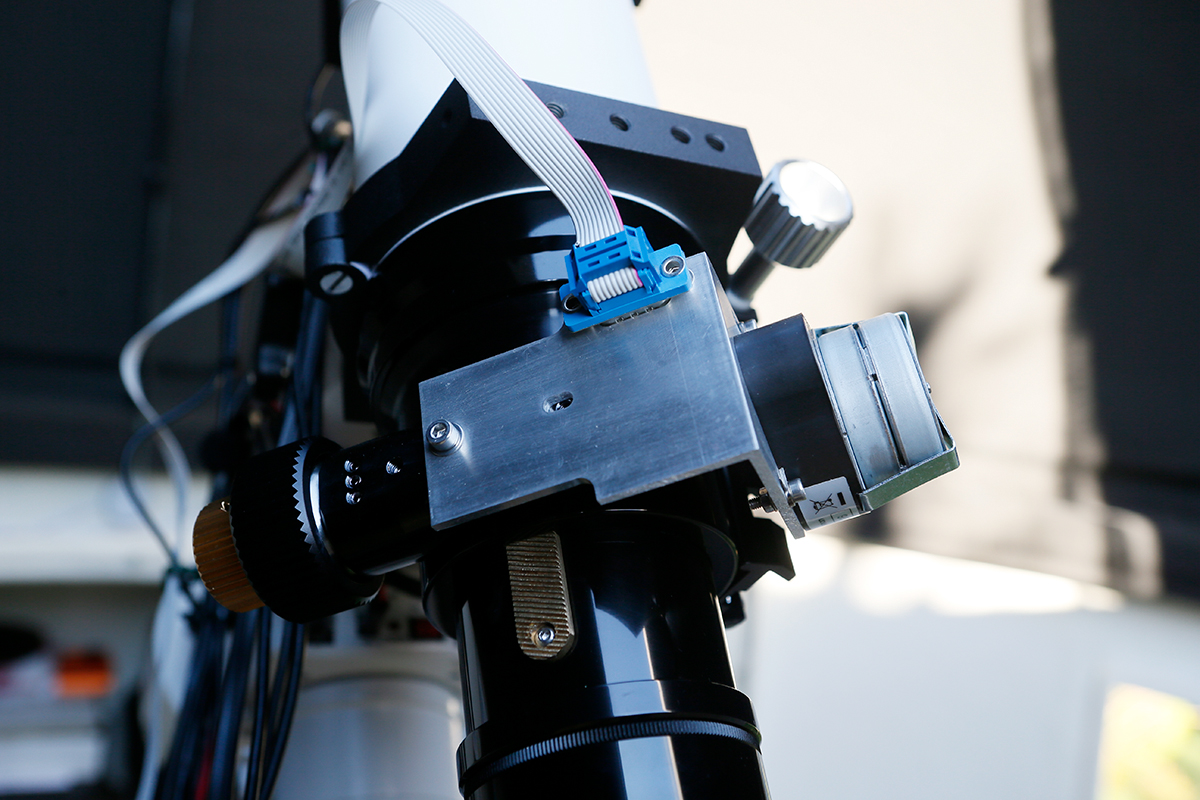
There are several options on the market that enable auto focus through a stepper motor, but I went for the Lakeside Astro system and I am not disappointed. It has transformed my imaging, allowing consistently sharper focus than I ever achieved by eye and it does it all automatically, even while I'm asleep! I have it set to refocus on a filter change or a 1°C change in temperature (using its integrated temperature probe). It is a simple system to fit, works brilliantly and can even be fitted to my Celestron EdgeHD 800. (lakeside-astro.com)
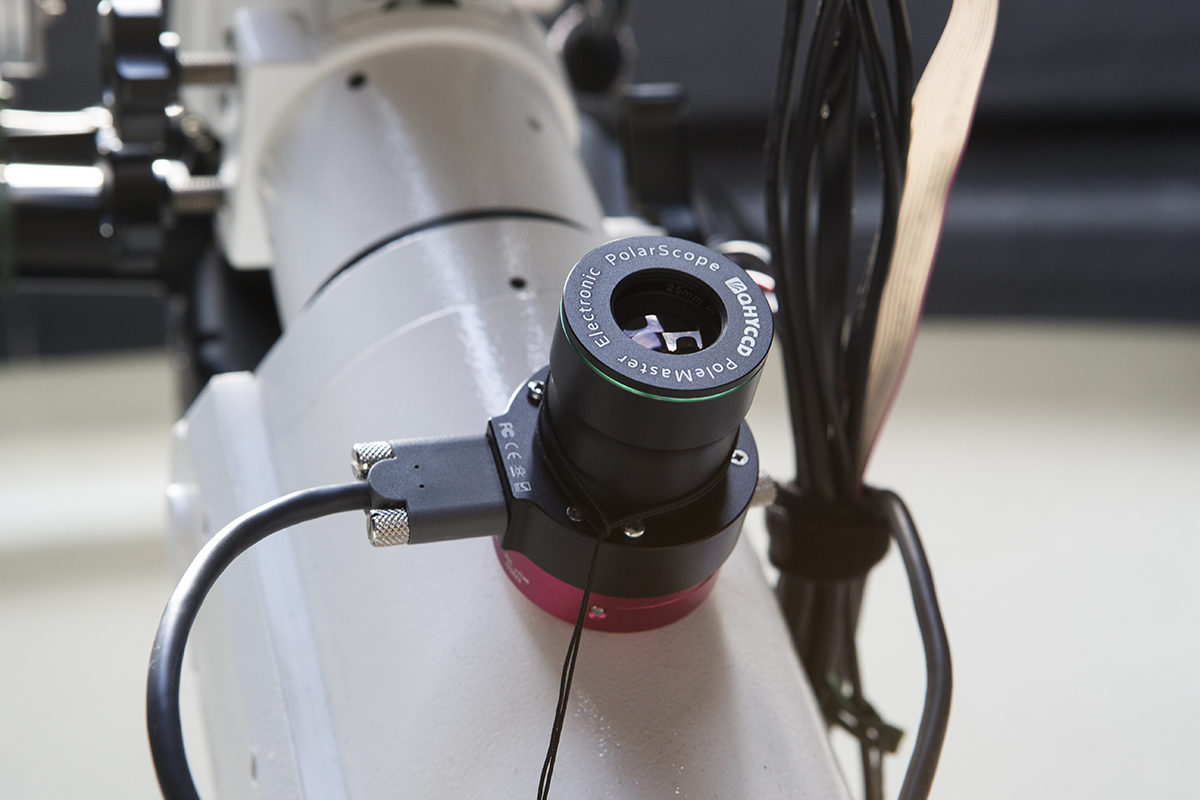
QHYCCD Polemaster
My most recent astro purchase is this nifty device; the Polemaster from QHYCCD. It is a small sensor with a wide angle lens that is inserted into the polar scope hole in my HEQ5 mount via an adapter. The supplied software measures the error in polar alignment by imaging the area around Polaris. A target is displayed that you move on to the North Celestial Pole by adjusting the mount's altitude and azimuth controls. I was fortunate enough to have clear skies to set up and accurately polar align, but I await conditions to image and see whether my guiding has improved. (qhyccd.com)
Control & Capture Software
Sequence Generator Pro
Sequence Generator Pro is the conductor of the orchestra, ensuring that all the various elements of equipment work together at the right moments to gather the data for the given target. Mount, imaging camera, filter wheel, guide camera, focuser, dome, and cloudwatcher are all linked in to the software. A sequence is prepared with instructions about target position and sub exposures required, then just hit 'Run Sequence' and watch as the magic begins. It deals with all the autofocus routines, platesolving and shutdown actions. It is quite simply an outstanding piece of software! (mainsequencesoftware.com)
The layer of software that interfaces with the HEQ5 mount. (eqmod.net)
PHD2
The autoguiding software that keeps the mount pointing to within sub-pixel accuracy at the target throughout the exposure. PHD stands for Push Here Dummy and it lives up to its name, it is amazingly simple to use, yet it is performing an incredibly complex task. (openphdguiding.org)
Alignmaster
A small application that helps to obtain accurate polar alignment of the mount. (alignmaster.de)
Cartes du Ciel
A planetarium application that can be linked to the mount through EQMOD to slew to any target you select. (ap-i.net)
TeamViewer
The software that I use for remote access to the observatory PC. This means that I can control everything from anywhere (with internet access), including from my sofa, which is wonderful on the cold winter nights. I do enjoy standing outside and looking up at the night sky, but it is very useful to have full remote control from indoors too! (teamviewer.com)
Genika
The image capture application that came with the Chameleon 3 camera that I use for solar imaging. (genicapture.com)
Processing Software
Astro Pixel Processor
This is a new piece of software that I have recently moved to for processing the image capture data. I am finding it a brilliant tool that works extremely efficiently. It takes all the image sub-exposures and calibration frames and makes all the calculations and alignment to output stacked and registered images that are ready for the next stage of processing. It is also very good at creating seamless multi-panel mosaics. (astropixelprocessor.com)
Adobe Creative Cloud
I could not be without the Adobe suite of software. The main tool that I use for image processing after the initial combination of data in Astro Pixel Processor is Adobe Photoshop. It does have a pretty steep learning curve as it is such a powerful application, but once the basics are mastered, I find it the perfect tool to bring out the best in the data to create an amazing astrophotograph. I use Adobe Lightroom for processing RAW files for wide field images and especially for time lapse sequences. Finally, I use Adobe Premiere Pro for all video editing. Oh, one more piece from the Adobe suite is Adobe Dreamweaver, which I use to put together this whole website! (adobe.com)
Autostakkert
A superb piece of software that I use for stacking frames from a video file for planetary and solar imagery, so called 'lucky imaging'. It just gives the best possible results. (autostakkert.com)
ImPPG
This little application is an essential piece of my solar imaging arsenal. It takes the image output by Autostakkert and runs Lucy-Richardson deconvolution to sharpen it up. It is a bit of a magic wand! (imppg.com)
Future Upgrades
However much equipment I have, it never quite seems to be enough! I have plans to make the following upgrades as and when funds allow. Please send all donations to The RPO Fund...!
Lunt Double Stack - I would love to add a double stack filter to the front of my Lunt LS50THa telescope to further narrow the bandpass and increase the detail in solar features. This would require about £1500.
Large Refractor - While I like my Celestron EdgeHD 800, what I would really like is a 2000mm or longer focal length refractor. These really don't come cheap and a budget of over £50k would be needed to secure a TEC 250VT, though with a focal length of 2200mm it would be spectacular. Oh, and I would have to upgrade my whole observatory too just to fit it in! I have a feeling this might remain on my wish-list for some time to come yet...